Showing posts with label stitch. Show all posts

07 January, 2018

The Gift That Went Missing


Wonder clips holding binding in place. While it was foggy outside, it wasn't raining on this sunday for a photo shoot. I work during daylight hours, so this was my opportunity to get the whole quilt photographed.

 I made a quilt for my son and his girlfriend. A huge gingham style flannel throw.

A while back, he sent me a photo of their living room and the used rug his girlfriend had just bought on ebay.
A few days later, I saw my inspiration quilt over at SOTAK's site and I started planning a quilt.

What could go wrong?


Other than the fact that I don't quilt. ahem.

I carefully worked out the yardage and then grabbed Pencil Girl for a Fabric Depot visit.
We found the gingham colors of black, grey and white right away. The backing fabric in a deep red was easily located as well.
But then it took an hour and a half to decide on the binding fabric.
(this is number one of my reasons for why I don't quilt - endless fabric decisions that take hours).

Pencil Girl saved me by reminding me there isn't an even amount of squares of each color. We had to find an actual gingham and pen out a mini-map of the squares.

Then I washed  my flannels - cuz they shrink. Even though they were quilter's flannels, they still shrunk and not in the same way.

I cut my first squares with no problem. The 2nd fabric wasn't long enough to yield the same squares because the stupid fabric shrunk widthwise instead of lengthwise.

I left plenty of time for this quilt . I started it in October for a christmas finish knowing how busy I am during the holiday season at work.

This super easy large-block quilt required way too many overnight decisions. I decided to piece my squares on the 2nd and 3rd colors to get the right amount instead of going back to the store and hoping they still had the same fabrics.

It's flannel and no one would notice.

Uhhh...did I mention that flannel stretches? Each time I handled it, or ironed the seams flat, it stretched. It was a fun party attempting to get my squares to line up as I sewed the rows together.


 I wanted to add a small gingham motif to the backing to break it up but because of the afore-mentioned piecing of the squares, I barely had enough scraps to create a smallish motif.

I thought I had pieced my backing to the same size as the front. 70 inches x 70 inches across for a square quilt. But I didn't.

More overnight decisions. It's coming on Thanksgiving and I need to be further along on this project.
I decided a square throw is over-rated and decided to lop off one column of the gingham. Each square is 10" wide. So now my throw will be 60" wide x 70" tall. Better all around.


I finally get my quilt sandwich together and because of the stretching I encountered while piecing, I decide to hand-quilt this puppy. Machine quilting would probably result in wonky and wrinkly on the other side.

The hand-quilting went very well - probably the only thing in this darn quilt that did. I was contemplating stitching on both sides of the seams but it's flannel and there's enough nap to hold the fabric layers stable.    And the christmas time-crunch.

 I used a sashiko stitch which is really just a running stitch but a tad more refined.
For instance, in sashiko, you don't meet at intersections. There's a little space left in the middle, by design.


 For the binding, I used pillow ticking fabric to recreate the stripe
This fabric behaved as expected.

I hand-stitched the binding down. I zig-zagged my edges of the quilt to compress the layers.  I machine-sewed one side of the binding down and then folded it over to hand-stitch and finish.


And got it finished in time to ship to ds and girlfriend to arrive before christmas. Which  the tracking showed it did.

But it didn't.
Stay tuned for part two of why I don't quilt.

08 April, 2017

Spring Embroidery


There you go.
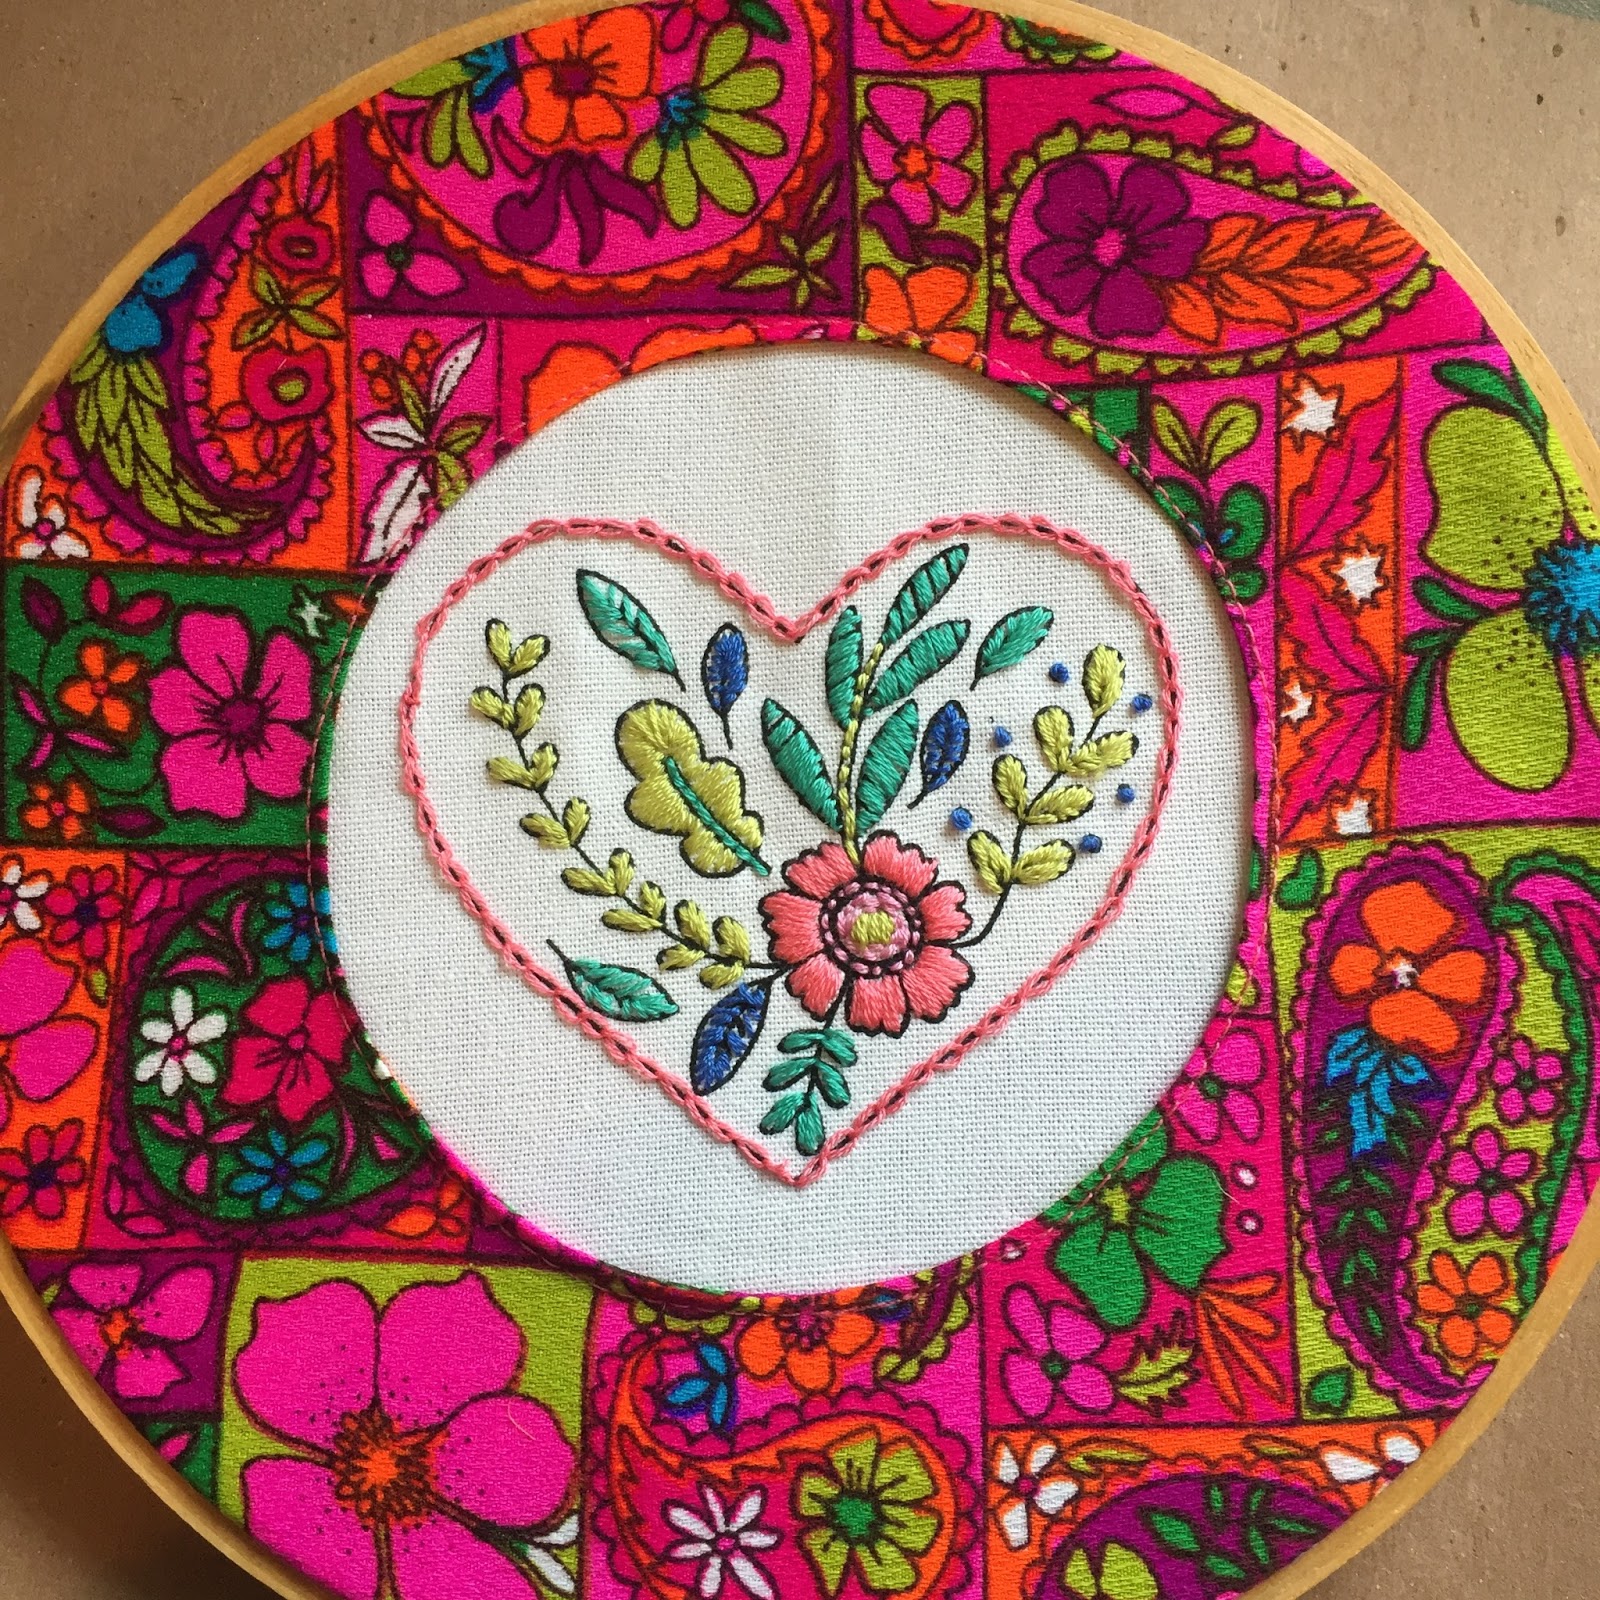
Embroidery done.
Framed.


I had intended to make this 4 inch embroidery from MollieMakes Magazine into a card or incorporate it into a small frame purse. When I walked into my sewing room, this vintage Hawaiian Textiles print jumped up off the lower shelf and told me I had to make this into hoop art.

The colors and shapes of the leaves and flowers are uncanny in their similarities.


I backed the hoop with some felt from stash, the hoop also came from stash, and it's already packaged and into the mailstream to the person I was thinking about when I was stitching this.


Pruning canadian hemlocks. Vacant bird condo was relocated to a special spot near the front door.
  After our cold, snowy winter, we are enjoying daily deluges of rain, making the ground pretty soggy.

Too soggy to weed.

When a neighbor cut down some trees, I jumped at the free chip mulch. I spread it right over that Artillery Weed - super thick. Now I don't see the weeds but these glorious red tulips.

I call this ecological recycling as the chip mulch didn't have to travel far, thus saving our planet for another day. lol


These happen to be my favorite tulips that survived our gale force windstorm yesterday. I hurried out to take a photo before the storm hit but these are protected a bit by the lilac tree bushes.


Music box on my dash of my car.
My super garage sale find of the week. A treadle sewing machine music box. Still trying to identify the tune - we've all heard it before -- sounds so familiar....

I need to dust it off and spruce it up a bit. The treadle portion goes up and down while the music plays. It's about 6 inches high.


Need more photos of artillery weed? When it goes to seed, the seeds pop off and get in your eyeballs?

03 April, 2017

Half Stitched and Mollie Makes Giveaway


I'm carving out some stitching time. I had some errands in the next town over and ran by Joann's, 'cuz that's what you do when you're out and about.

They had the May issue of Mollie Makes on the rack plus some Portland Timbers' fabric in the clearance bin at $3 bucks a yard.


And weirdly enough, they now carry EOS lip balm and hand lotion. Which my friend's daughter likes. At 50% off with the coupon.

Successful outing on all fronts.

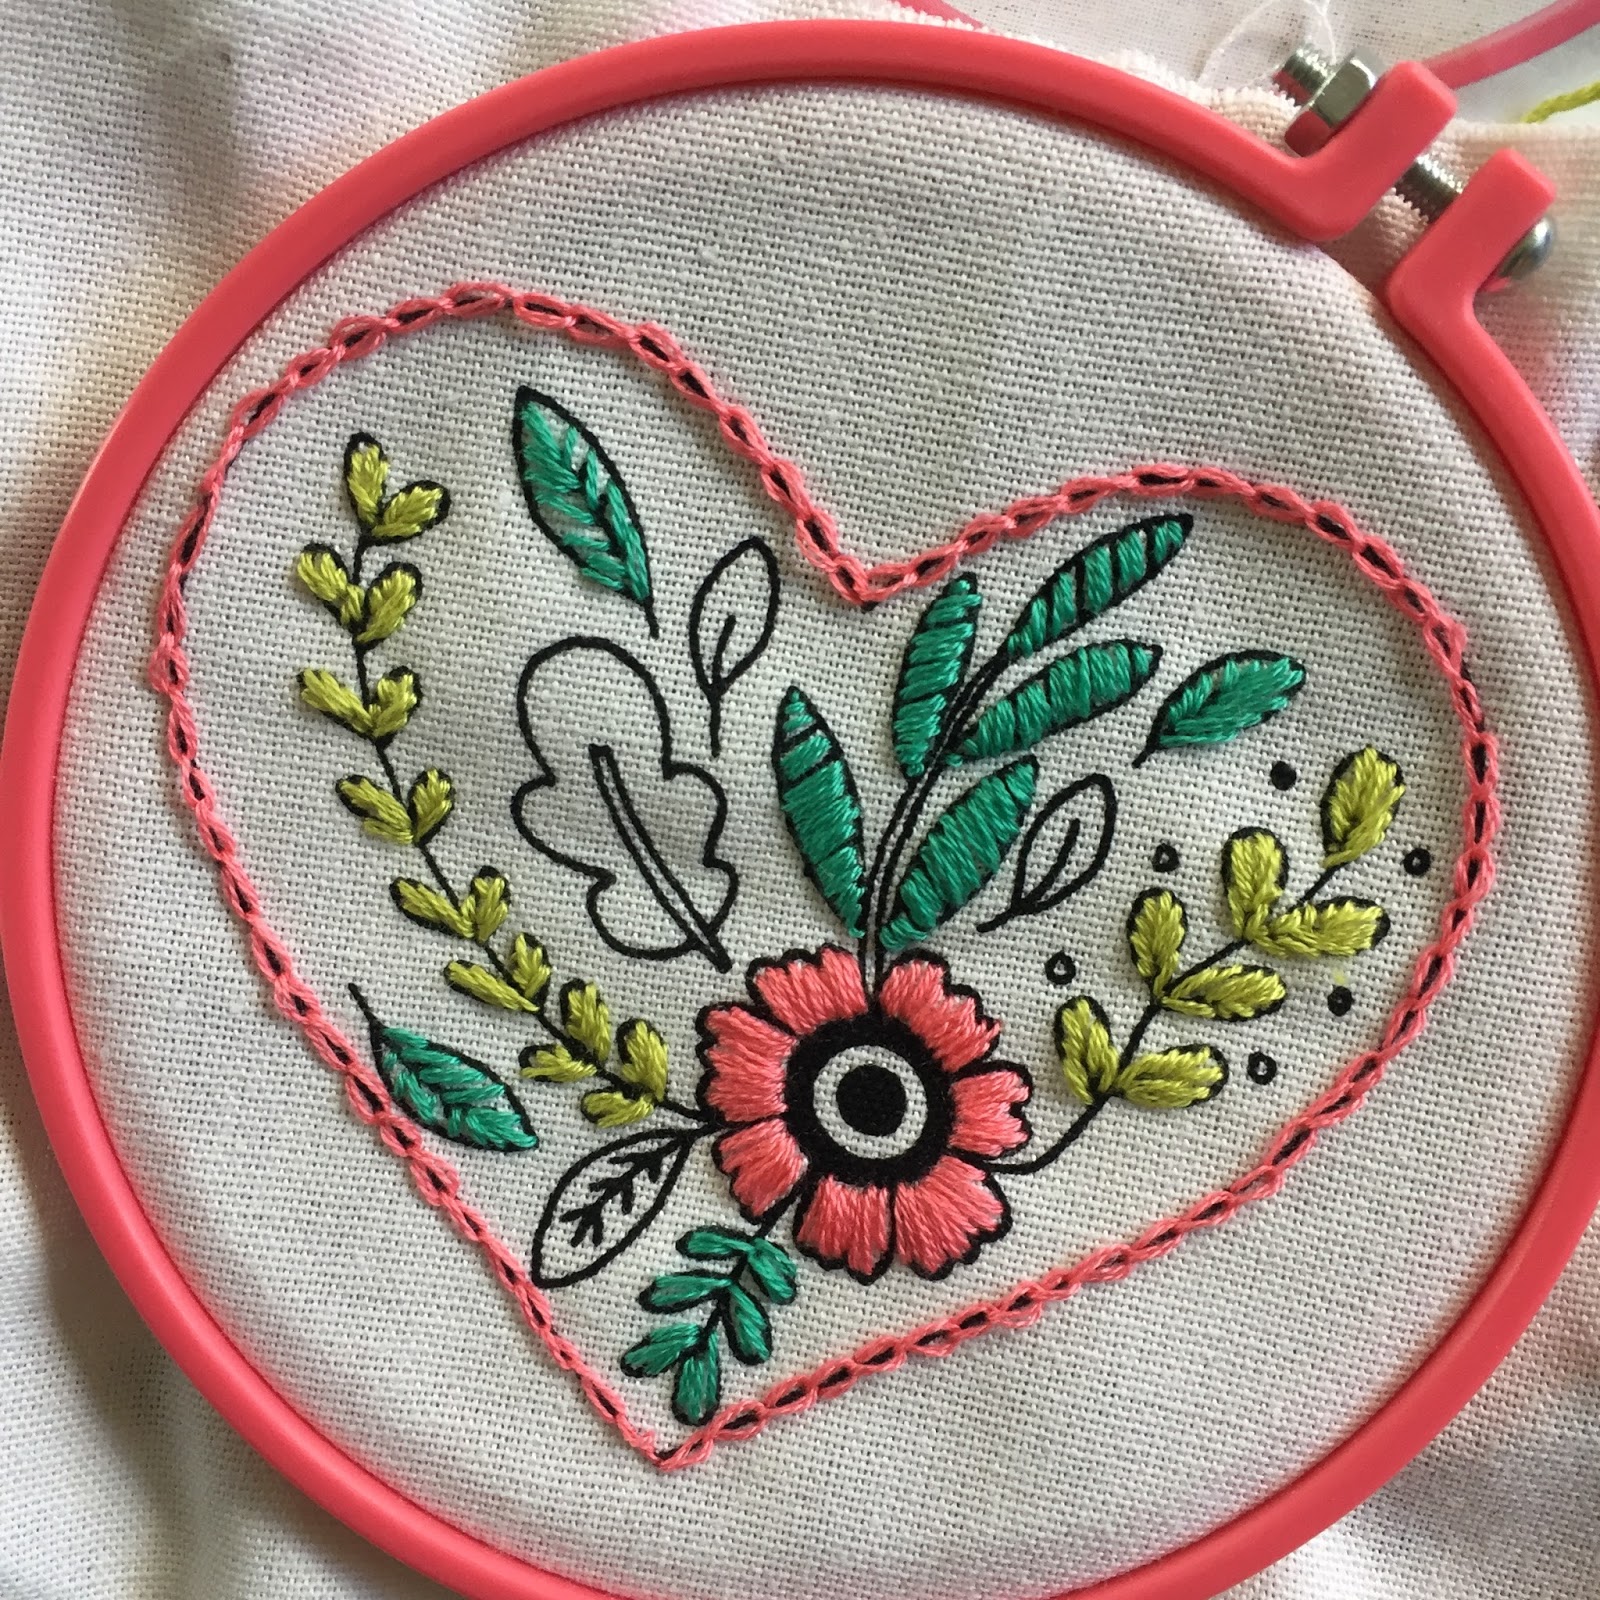
I  enjoy small embroidery projects. I did some cross stitch when the kids were babes. The only thing I got out of cross stitch was to mind how the backside looks - 'cuz people (diehards) look.

I can't quite decide what I'll make with this finished floral heart. I'll either make a card with it or stitch it into a frame purse. Or, it will wallow in the drawer to age it a bit. It's a cute little thing at less than four inches across.


I, ahem, also have an unfinished sashiko project of pretty pink cherry blossoms. It's almost halfway stitched. This is definitely a small space project, suitable for airplane rides up to Anchorage in May to visit my dear daughter.


GIVEAWAY!!!

I read through this latest issue and almost tried my hand at crochet and a fun granny square pattern. I'm in my spring clutter-free mode and I would love to give this magazine away to someone who can use this magazine or just wants a fun read through. It will be missing it's project ('cuz I did do the stitching fun).

All the projects inside are detailed on the cover on the left. Pretty botanical papers in the middle, a cork wallet, that super fun granny square pattern, some awesome felt bakery food items.

If you're interested, I'll ship anywhere in the US or Canada.


Leave me a comment. If you aren't a blogger, please leave your contact email in this format: You(at)email(dot)com.

I'll pick a winner this weekend - April 8th, 2017.

Stitch on!

16 November, 2016

Holiday Candy Dish


 I had a small ball of clothesline left over from my last rope bowl. As I was sewing a medium sized gift last Saturday, I kept bumping into it. And then I saw a rope bowl online that used small strips of fabric wrapping to provide color and Voila!  --- another 20 minute gift completed.

I used one- inch strips of fabric from my scrap basket. I originally pulled whatever colors that got my eye and then as I was sitting down, ruminating on the purpose of this gift, I decided to just do red strips.

These strips are between 4 and 5 inches long - little pops of color on the neutral base.

Finishing off, I did  a little loop with the intention of doing four more. My process is very organic. As I was marking those four spots for the loops, I decided it was such a small candy dish size bowl , that it just needed two loops, which organically, ended in the spiral thingy.

While photographing the bowl for this post, the candy dish looked slightly "off". In a massive "Aha!" moment, I stitched that weird spiral down against the side and now I am very happy with my newest rope bowl.


Styled with my beautiful persimmons. I am waiting for the persimmons to become ripe which actually occurred slightly after Thanksgiving last year. The yellow will  become more orange and there will be a slight give to the fruit when you handle them.


12 July, 2016

Second Rope Bowl


 And the handle theory worked.

I was gonna throw the remaining rope out to the garage to tie up some raspberries - or something. Noticing that maybe I only used 80 feet for the big bowl, why waste the remainder of this cotton rope in the garden?

Re-threading, I tried out some metallic thread. Another tutorial had problems with it and I did at the edge of the bottom when it suddenly broke. Good time to re-thread, so I tried a variegated purple and I love how this smaller bowl turned out.


My african violet likes the bigger bowl?


 See how much smaller this bowl is?

This is how I sewed it, but I actually liked it better flipped inside out. The red at the bottom is more vibrant. This was a regular red thread in my bobbin. The metallic adds a subtle degree of sparkle but it was banished to the bottom as being too subtle.


I managed to get the handles equidistant but one was bigger than the other.

There are no mistakes with this bowl making. I threw it back under the presser foot and sewed the handle to the body for perhaps 3/8" and Ta-Da!

Beautiful.

Kathy's notes::::  This smaller bowl sewn with 4.8 width on the metallic, with 4.5 on thread change-over.    Length was 3.0 - 3.5


****Sandra was also thinking about sewing a rope bowl and had some good questions:::

Her inquiry;    "I've seen different versions of those bowls on Pinterest and I've been dying to try making one, if I can find the supplies for a reasonable price (which isn't always an easy job here in $$Canadaland$$!).  Yours is gorgeous - did you just know automatically (by feel, maybe) when to start shaping and how much to angle the rows, or did it take a while for your brain to work it out?  How hard was it on your hands and shoulders?  I get terribly hunched shoulders when I freemo quilt (although I haven't done it now in years) but my main problem now is my hands - they tend to get cranky. "

My long-winded answer:::
It took a solid hour - maybe 1 1/4 hours to make the first one. The smaller one took 15 minutes.

 I had been thinking about it for months. I knew I did NOT want to try the fabric wrapped version. Other than securing the bottom and angling the bowl 'plate' UP at 6". it was very organic. Look again at my Pinterest board. I added some ideas. Odd # stripes is from landscaping and window dressing advice: group in 3's and/or 5's.

You can only sew until your bobbin runs out. I used five on the the large bowl, most of two on the small bowl.

The body hurt is all at the beginning where you are hunched over trying to get the zigzag to catch both coils. When you angle the bowl up and start the shaping, then you can consciously sit tall in your sewing chair, relax, and find your sewing rhythm. My clear foot has two red dots on it on either side of the center 'opening' (toes). I working on letting the dots guide me.

Easier to get tense at beginning because of the curve sewing.

Because of the bobbin changes, it's easy to take breaks. The design was very organic.

I would say the body hurt of FMQ is way worse. All of these people who have awesome quilts send their quilts OUT to be FMQ'ed. They don't do all the work themselves.

Good questions!


**** lucky me: I have four places in my small town to buy cotton clothesline. 2nd and 3rd places were cheaper. I am trying some 3/16" wide stuff now. The first rope was 7/32" diameter - so a little bigger. I'll hit up the 4th place in the next day or so.

10 July, 2016

Rope Bowl


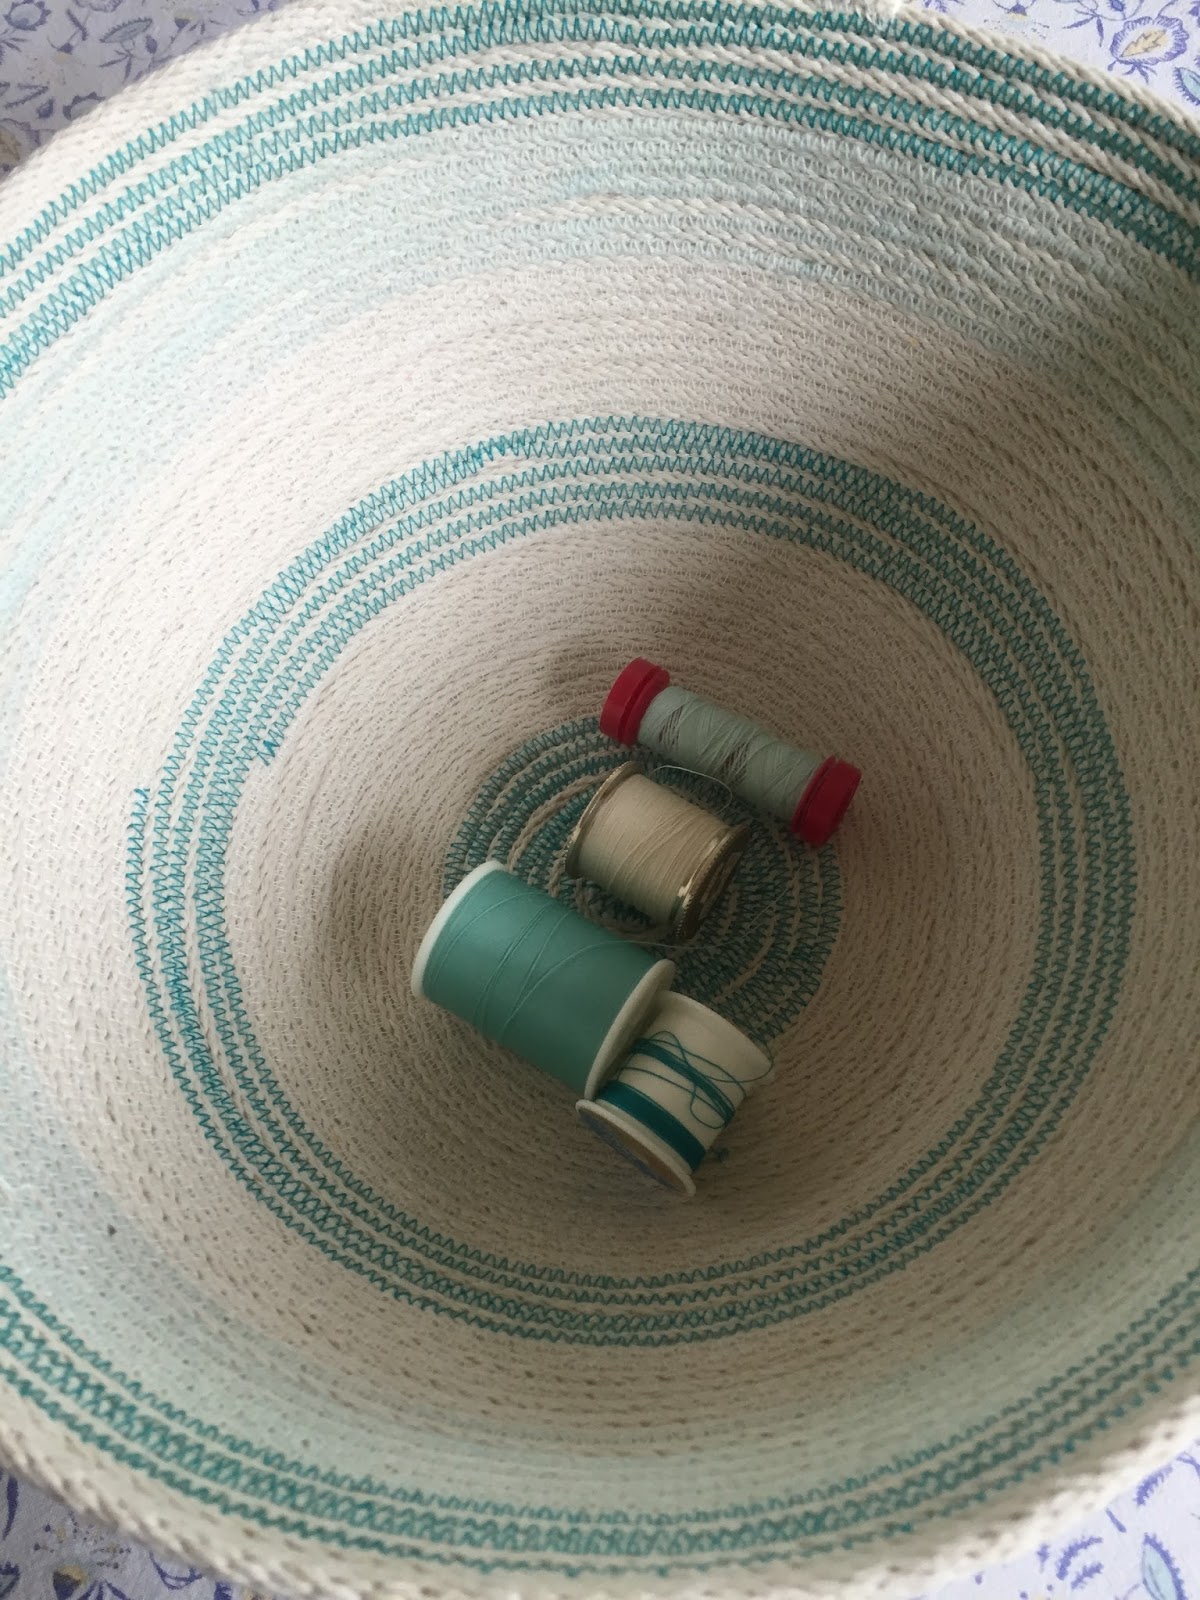
I had this on the back burner in my head for many months and finally stopped at Ace Hardware and bought the cotton cording. This cording is about 1/4" in diameter and flexes quite nicely as you sew round and round.

If you would like to make one yourself, I can assure you they are addicting as well as slightly hypnotic (endless circles). There's no one right way to make these and certainly no wrong way.
I have a Pinterest board where I keep some photos of some nice ones that were created.


 To start a circular bowl, you'll need to wind your cord in a circle and stick some straight pins through from the side to secure. Then carefully start zigzagging so the stitch catches both coils.
At the beginning,  take two stitches, lift your presser foot, pivot, and sew another two stitches and repeat. At about 2 1/2" wide (see photo) you don't have to lift your presser foot so much and can start feeding it through on the curve.

I tried to sew over my pins at the beginning and ended up hitting one and breaking my needle. This is really the trickiest part of making the bowl. Keeping the bottom coils flat enough as you zig zag in stops and starts. Maybe pull your pin out enough as you pass and then stick it back in. The pins are only there for a few rounds.

I'm not real OCD here. The tutorial I read indicated she was (ocd) and, if you are OCD as well, then you'll want to count stitches, lift the presser foot, pivot the coil, sew the same count as before so your stitching ends up a little more even than mine.

I can assure you, no one will notice and, usually, there will be an apple or two hiding the bottom anyway.


At 6" across on my flat bottom is where I started lifting the bowl up, thus creating the bowl effect. A couple of rounds of stitching and it's starting to look like a bowl.

I ran through about five bobbins of thread and switched from aqua to off-white. I also didn't match the outer to the inside. I wanted the more vibrant aqua inside with a quiet turquoise-green on the outside.  The cording is already off-white and contrasts beautifully with any color you choose. The five stripes of aqua as I sewed up the bowl cleaned out a bobbin-worth of thread.


 Based on the Pinterest tutorials that I saved, I went with a 4.8 width to my zig zag and a 3.0 length. You can adjust a teeny bit, like me to 4.3 width but any abrupt changes will show. It's up to you if that bothers you.

I will tell you, as you are going round and round, you want to make more of these to incorporate any changes you dream up.


 I wanted the sides to be a bit more straight here so I had to lift up with my left hand.
This particular cording fed very nicely allowing my right hand to keep the coils centered and the rope evenly feeding.


You can see my soft aqua on the outside here. Subtle change in color.


How to finish.

Well - you have to eventually. I liked a knot here so I sewed up to the knot as close as I could get and then back-stitched the end in place.

I've seen handles. Holes left purposely to make handles, etc.
You just sew to the place where you want a handle in place and run your zigzag so it doesn't catch the upper coil for 3 or 4 inches (5?). The handle will be a bit fuller than the previous coil so when you want to end the handle hole, you bring the outer coil down with enough give to create a visible hole. Move your zigzag stitch back so it catches both coils.  Continue sewing to the other side and repeat. It probably would be helpful to mark those places with a pin or wonder clip.


I used up nearly all of the 100 feet. Maybe 90 ft and made a good-sized bowl.
 

 My rope at Ace Hardware was not on sale and cost me $14.99. Ouch.

On the search for a cheaper alternative because now I need to send this rope to my friend in Japan so she can play too.


A close-up of my bottom - ha! not mine, the bowl's bottom. That first darker teal is where I broke the needle. The second is where I ran out of bobbin thread and started again. The thread tail got caught up in the stitching.


 I used a butt-load of thread in this project. Good thing I find lots of spools at garage sales.
Maybe five bobbins too. I filled as I went because I didn't really have a plan other than the aqua stripes. If you are organized, you could pre-fill your five bobbins beforehand.


About the stripes: I arbitrarily did five rounds ( an odd amount) but also this is where a bobbin would run out. 

The OCD person didn't like the looks of the starts and stops of the color switches all randomly around the bowl and wanted these all in the same line up the bowl. Thankfully, I don't see the stops and starts and that means I'm doing okay with my auto-immune, 'cuz OCD is a symptom when I am really stressed.


One very awesome sturdy decorative bowl.