30 September, 2014

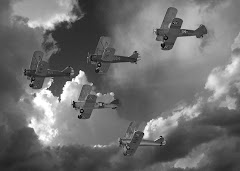
Airplane Zippy Pouches


Teresa's
two grandkids (&family) are living with her and I thought these zippy pouches would be just the thing for them.

 This last Saturday, we met up at the Flock & Fiber Festival and both grand kids came also so it was good that I made these last-minute pouches Friday night after work.

The pouches are off this tutorial and measure almost 9" square.
The perfect size to store die cast cars or airplanes.

I added Stearman patches from airplane sign patch material onto the backs to make me smile.


It's just as easy to make two as it is one.

28 September, 2014

Flock And Fiber Festival Canby 2014


Yesterday, I met for the first time, one of my favorite Oregon bloggers, Teresa Kasner.
She writes over Corbett way with stunning views of Mt. Hood, Crown Point & Multnomah Falls - where she does volunteer work every week.
She is a gorgeous photographer and showcases a lot of iconic Oregon scenery.

She made some crocheted bunting that I just love. She used it on her annual family camping trip and it made the canopy very bright and happy.
She has shown Multnomah Falls in all seasons. This one is from last Fall.
She also likes to photograph flowers which I enjoy seeing.


She treks over to Canbyland for the Flock & Fiber Festival most years and I suggested we meet up.

The Flock & Fiber Festival is all about flocks of sheep, goats, alpacas, etc and their fiber.
How to spin it, dye it, knit it, crochet it, felt it.


Felted purses. I liked the felted 'leaf' flap with the burn outs.


Teresa coveted these baskets.


While I need to pull out my felting supplies and do some needle felting.


For the Bunting Queen, Benta,  over in the UK - apparently this trend has made it's way to Oregon. Quite a few booths featured bunting for decoration.

Vendors were selling wool, roving, felted creations, knitting paraphernalia - stitch markers, hand-turned needles - anything to do with sheeps, goats, rabbits, alpacas and llamas.
 

The Spinners were set up outside where the sun finally broke through the clouds and people in their wool jumpers suddenly got hot.

I rather liked the dude on the right with his hair-do.


Teresa brought her husband and two grand kids along. Her husband used to raise goats and told a few stories about how they get the horns off while still babies. These goats with the horns escaped that.
Her husband also flew helicopters in the Vietnam war and afterwards on the oil rigs and I enjoyed those stories too.

It was fun to watch the boys with the goats and alpacas. I miss having small children around.


These boys reached right in to pet these goats and alpacas.


This is for my bloggy friend Gene Black. The denim strips were woven along with some shiny silver  mylar and yellow ribbon to create this large shawl.


The Flock & Fiber Festival is a free event that comes to Canby each September at the fairgrounds. You can register for classes online or just come and watch the animal judging and vendor booths.
People come from far and wide with their creations to show off and talk to fellow fiber artists.


The spinner below in the video was telling me about the "2:00 pm   Spinner’s Triathlon Competition – Central Lawn" on Sunday.

 I've always gone on Saturday after work but next year, I think I'll make time for the Spinner's Triathlon - a fun way to show off your spinning talents.

If you've ever wanted to spin fiber into yarn....


27 September, 2014

Joann's Fabric Store

A friend sent me this:

Great discussion on how corporate america really works big box stores.

Did you read this?
http://thebitchystitcher.blogspot.jp/2014/09/behind-bolts.html


I work for the federal government and my job is run almost exactly as posted in the above.

My local Joann's is 20 minutes away. My best fabric store - Fabric Depot, is a good 30 minutes away. It's often faster to drive to Fabric Depot to get a few items than wait in line at Joann's. Of course there is that dreaded carbon footprint of driving more and longer distances....

25 September, 2014

Pendleton Pillow Time


I had a request by the nephew to make a U of O pillow ;'()


He was here in the summer and saw one on the top shelf of my sewing room. I used to do holiday bazaars and still had a couple of Oregon State &  University of Oregon pillows leftover - need to photograph them and throw them into the etsy shop.


I thought while I was at it, I might as well sew some new pillows for the son's new place.
I had one 24" pillow form in stash - the others are a small 16". The 24" is nice and big for three young men.
You have to have a matched pair of pillows  - I certainly have enough wool. I may even go for a triplet set.
It's a great excuse to go to the fabric store to buy another 24" form. 


 I sewed some Pendleton pillows last fall for a friend and repeated it on a larger scale.
 
 Her's came out at 18" and they look kinda puny on today's humongous couches.

I picked up the red plaid shirting at the Pendleton booth at SewExpo this spring. The rest of the wool strips are from my stash. I've been sewing for 2 1/2 days straight from my stash and has it decreased in size???
{rhetorical question - do not answer}{{unless you have a joke about the size of stashes}}

Here is the U of O pillow case (18") folded into a ziploc bag. This is how I am mailing it.
Yes, you can mail in a see-thru ziploc bag. Use the freezer ones as they are thicker. Tape well - no loose edges.
The recipient (and me, too) gets ridiculously excited to see the actual item inside the packaging they are getting in the mail. Smiles all around!


Usually at 18", the envelope back will pop open (exposing the dirty underside of pillow business). I incorporate zipper installations to keep things square. My stash did not include a green nor a yellow zipper so I did a wide envelope back.


One side is cotton, the other is soft polar fleece.


24 September, 2014

Wallet Design


 The thing about sewing purses and wallets is eventually, you have enough techniques to design your own.

I have been seeing these wallets with the strap that secures your credit cards all year (on other people) and contemplating how hard it could be to sew one up.


Well, first, you have to identify what you want that wallet to hold:

Credit cards (5 slots) and the strap to secure them - check.
Photo ID vinyl pocket - check.
Cash pocket - mad money - check.
Zippered pocket  - for change and other weird stuff - check.
Key Ring - check.
Small enough to hold in your hand - the essentials. - check!

Some of my inspiration was from these two tutorials that I sewed up on my blog.

Thimbleanna - A Purse Thingy  which I sewed up here, and here.
I liked the back pocket and the zip pocket but it was short on credit card pockets, This is where I made my ID template for my license. Hers was too small - easy to enlarge.


Fabric Mutt - Key Pouch Tutorial.   I didn't sew this one. Her card pockets were constructed in a way that would all be the same depth and I didn't quite get this. I loved the picture of it. It encompassed the 'look' I was after. 
I recently sewed her Malibu Satchel which turned out fantastic.


 The ID pocket was perfect.
I changed the template from the original inspiration to show more of my photo ID and not lop off the address portion. Oregon also puts their ID # at the top. The vinyl is big enough to show  most of the card.

For this one, I did ironing on both the inner and outside and then top-stitched it down.


 The strap is inserted when you sew up the zipper pouch. Secured with a metal snap. The strap also doubles as a more secure way to hold this wallet.

This wallet is made with a typical zipper pouch technique. All I am doing is adding things to the sides before I sew lining to lining, outside to outside and turning it .  There's room to do patchwork or other fun things to decorate it the way you want to.


 I made two.

The second one was made because I had a lot of bulk in my seams. My credit card pockets were the entire width and I narrowed them down by doing a trim tape finish and sewing that down before the zipper seam. This allowed my lining to sit nicer as well because the giant seam was not pushing it out.


And, even though, the wallet is not long enough to insert cash flat, I still wanted to sneak another slip pocket in and did so on the ID side.

 Snuck some dragonfly's inside.


 The second one is not quite an inch longer and today, I'm gonna make a third and see what another half-inch will do.
Plus, I'm not entirely happy with fabric placement on the second. I like the airplane and postage stamp showing from the first wallet....


99% Success

Easy to hold, carries most of the every day running around stuff. Just working on the nit-picky fussy cutting.


One more thing: Small zippered pouches like this with bulky seams seem to created havoc with the zippered ends. I used this Nancy Zieman technique to create fabric ends which neaten up the zipper amazingly. (sorry - forgot to take photo of how nice it looks when turned.)

23 September, 2014

My Maxi Skirt


 I was at Fabric Depot early in the summer buying more airplane fabrics when another customer plopped this bolt up on the cutting counter. I had to know what she was making.

She was making another (!) maxi dress for her daughter.
I instantly fell in lust with the stripe variations and had to have some for myself which makes the fabric cutter person deliriously happy because she doesn't have to put a bulky knit fabric bolt back out on the floor display.

I had been seeing maxi dresses all over since early spring. Oregon may be known as a fashion forward thinking state but we are ridiculously backward when it comes to following trends.
I knew with my height and width, I couldn't pull off a maxi-dress but I could do a skirt.

I've been wearing this all summer and getting a photo snapped of myself is rather beyond my abilities so you get the hanger shot.
I wear it with a plain old white t-shirt. I should go shopping for something more dressy but it's not high on my list of things to do in my very limited spare time.


 I had t-shirt ribbing in my stash and pieced a waistband and gathered the width I wanted into it.
I serged the skirt and waistband together and then I used my coverstitch machine to do a triple stitch around it.
The most time-consuming aspect of the skirt was deciding if the stripes AROUND my body were more fattening or whether the stripes down would possibly make me taller.
Talk about mirror time.


This has been my go-to summer outfit. I was at the Bend Ampthitheater this July for a RIngo Starr concert and the ladies who were maxi-dressing looked special. The gals with jeans and t-shirts, or shorts & t-shirts looked too casual, dowdy, and not special.
This simple skirt makes you feel good, makes other notice you, and for once, slightly on trend!


 My knit is a very thin rayon that doesn't curl much. I was worried the rayon would be hot so I utilized the wide, white selvedge to make a side-slit. OMG, truly an inspired slit that wafts in the breeze and keeps your legs cool.
That said, sitting down when it's superhot, your skirt is gonna stick to you in a pluck-it-away-from-your-body moment.
Standing and walking is the best way to wear a flowing maxi-skirt.


My other confession? I didn't hem this. The ends didn't curl and I wasn't certain how low I'd wear this on my waist/hip.   So, I left it.   And didn't mind it.


I didn't use a pattern. Once I decided the stripes were going round my body, I figured out how much length to cut off. Tried it on again to figure out width for walking. Decided on the slit. Sewed a sloping seam from just above knee up to waist. Sewed on waist band. Coverstitch for band.
I would say 1 1/3 width (waist/hip measurement) for this thin knit for gathers and walkability.
I bought 1 1/2 yards of 54" wide fabric.

22 September, 2014

Malibu Satchel


Before attaching straps


 This was an easy sew up. The tutorial directions are easy to follow.
I, of course, had someone in mind, who is off to school this next week and I am way behind in my gift-giving.
I'm rarely content with sewing up easy gifts as directed.

I had a wool suit in my stash for the outside and some aqua sharkskin for the inside with a fun bicycle print for detailing.

 First off, I utilized the suit jacket pocket for the backside. It's a real pocket with oscar de la renta lining. Big enough for . . .??
I love the detail and the fact I just needed to cut around it to rectangular dimensions.


 For the front piece, I noticed the slash pocket on the skirt portion of the suit. Another fun detail with an unexpected pocket for ticket stubs, change, whatever without having to open the flap.
I centered my pattern piece over the pocket, eyeballing an amount that would be incorporated into the 'side panel' when boxing the bottom corners. When the satchel side seams were sewn and boxed, the pocket sits right where your hand can reach it easily.


The front piece with that slash pocket also had waistband gathers. In order to cut my rectangular piece out, I had to gather the bottom to that measurement.
A fun variation for the Malibu Satchel.


I'm off to sew a wallet now.