


My dear friend sent me this tshirt from Japan in a size large. Its a men's large. It fit me through the shoulders but the tummy area was bunched up and tight.
I needed a tshirt hack because I liked this color on me and it came from Japan!
So I started a Pinterest board. Pinterest helps me focus by being able to easily organize photo inspirations. The photos link back to where you found them, so if there is a tutorial, it's easy to find again by clicking on your saved photo.
I started a Pinterest board called Tshirt hacks and I latched onto the long vertical triangle of added lace under the arm to give me room for my tummy.
Brown cotton lace - how hard could that be to find? If we were still in the late 70's - no problem. Here we are in the current year with only a few colors of cotton lace to be had.
Dyeing white to brown is more difficult than you know. Polyester lace would work for the look but is way too itchy.
I met up with Pencil Girl at Mill End Store in Beaverton, where we spent over an hour the year before to find some lace for her to try her tshirt overlay. It took just under an hour to find this camo knit instead.
I didn't mind a lace insert at the bra strap area because normally you aren't holding your arms above your head to flash people, although some people are more comfortable with flashing.
Also, the insert, right there at the bra strap area, would be pretty narrow. The point of the insert is a wider triangle at tummy and hips to allow for more room there.
 |
| Side seam insert. |
 |
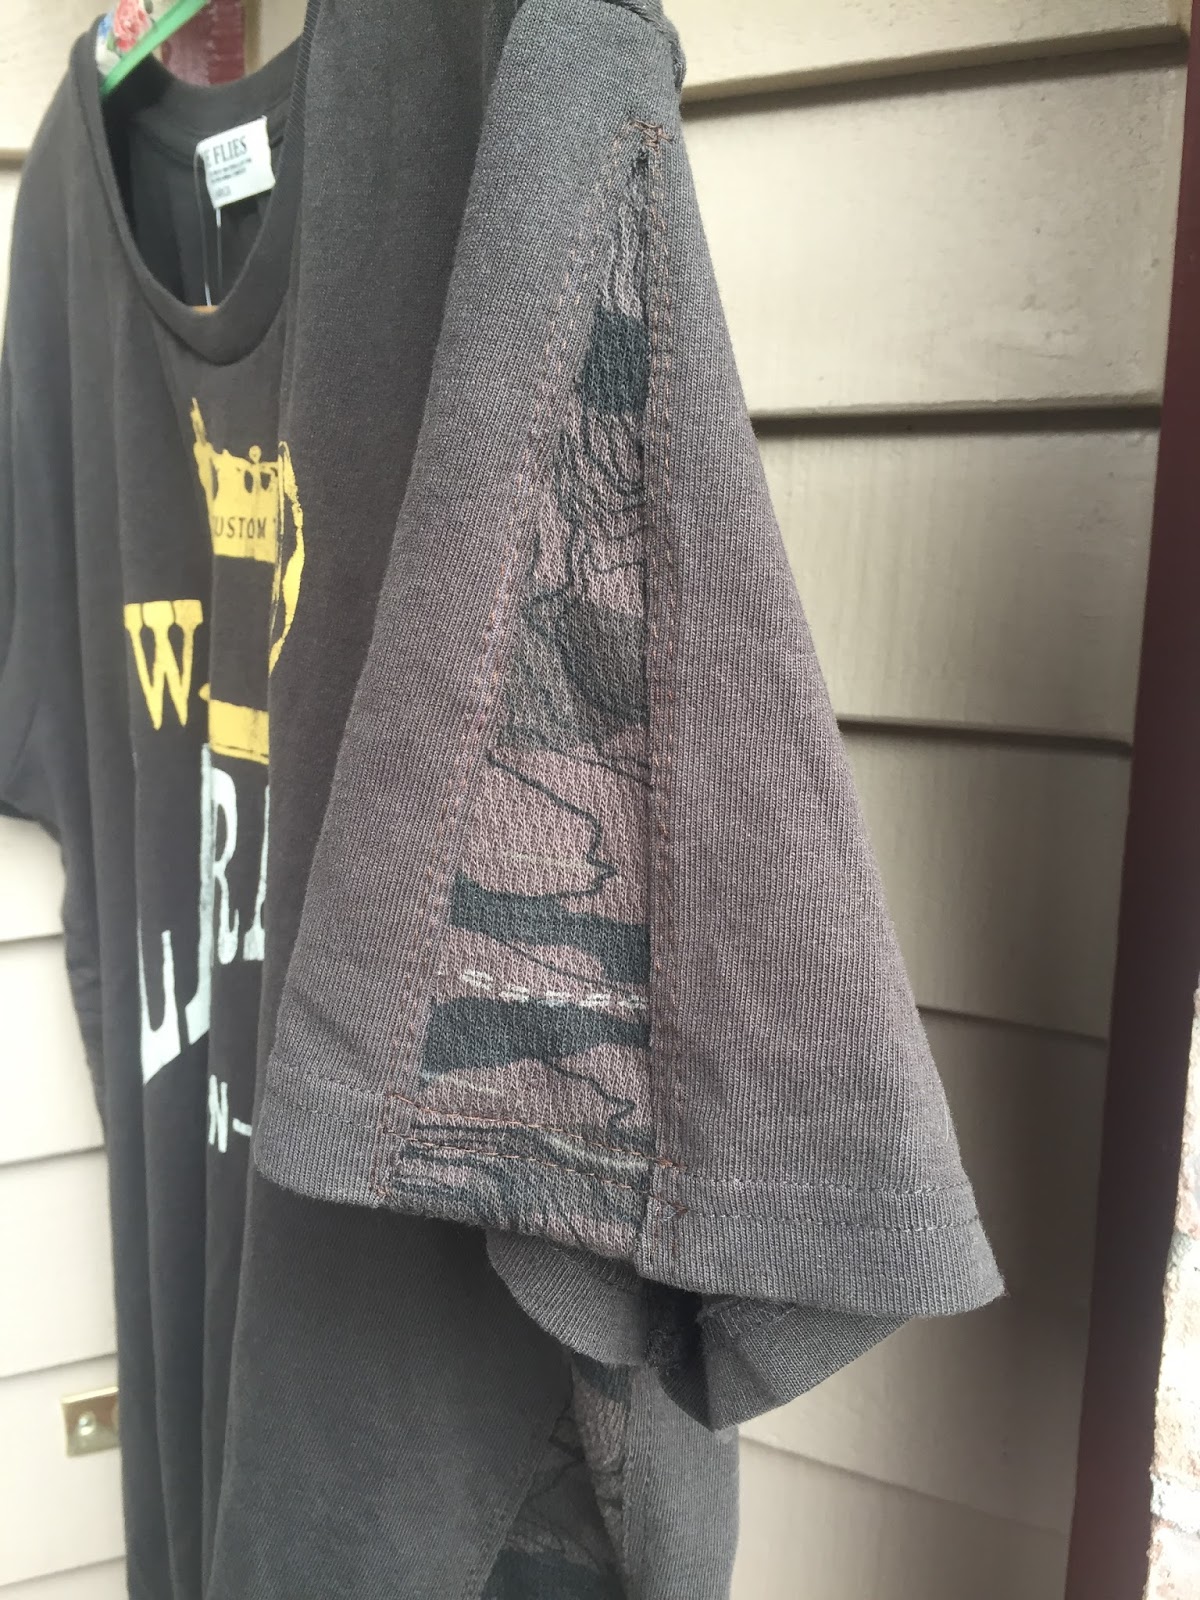
| Sleeve insert |
It went in so easily. I decided to add a godet to the sleeves too. Godet - word of the day, pronounced Go-day. And it means a triangular piece of material inserted in a dress, shirt, or glove to make it flared or for ornamentation.
The side seam godet was for fitting better and the sleeve godet was purely for ornamentation.
Feeling pretty smug, I attacked the neckline too.
The side seam godet was for fitting better and the sleeve godet was purely for ornamentation.
Feeling pretty smug, I attacked the neckline too.


Don't you love this color brown? Except it's not brown as we discovered in the fabric store, it's a dark olive. Anyhoo, like all dark colors, it's a beast to photograph clearly.
1. I cut along the side seam from the hem up to about 1 inch from the sleeve seam.
2. Knits don't fray, so I decided to just sew closely on the edge of my tshirt fabric onto the godet.
3. I placed my tshirt onto my ironing board and laid a 5 inch wide piece of the godet fabric underneath. Maybe 1/2" above my top cut but below the sleeve seam, extending down past the hem. We bought 1/2 yard of this material because of the way the camo pattern ran. 18" x 5".
4. I started pinning. Very close to the edge and just eyeballing that my triangular line was straight.
5. On the side with the serged commercial seam, I trimmed it off at this point, cutting close to the stitching.
6. My hint? Run your pins down one side in one direction and up the other side in the opposite direction. I sewed from the hem up to the sleeve seam on the right side, pulling pins out as I did.
However, when I came around the top, my pins were now backwards to being able to pull them out head first. So place your pins in opposite directions.
 |
| Bye, Bye, Care label |


8. I had some concerns my new seam would curl on the edges inside and make me crazy wearing it, so I stitched another line of stitching about 1/8" away and then later trimmed the excess of my godet fabric close to that seam.
9. My godet width at the bottom of the hem ended up being 3 1/2" wide. I simply turned up my godet fabric a matching amount to my tshirt hem and sewed it down using that same 4.0 stitch. Again, not a lot of stretch here. If you're concerned, you can get out your cover stitch and make a more commercial stretchy hem finish.
10. Finally, trim off your excess godet fabric.

 |
| You can see the double stitching here on the sleeve |

On a roll, I decided to attack the neckline too. Guys t-shirts hit me at the neck making me crazy. I don't like things around my neck.
I had pinned a hack showing how to turn a round neckline into a v-neckline. The technique said, and it's true, you can re-use the neckline binding up to 2 inches more stretch to make that deeper vee.
My machine design on the front of the shirt came close up on the neckline. I decided to keep the round shape but 1/2 - 3/4" lower.
And it worked. Remember, tshirt knit doesn't fray!
I snipped close to the binding from shoulder seam to shoulder seam (leave the back neck attached - just fooling around with the front side).
Then I folded my shirt in half, matching the shoulder points. I started cutting from the bottom about 1/2" - 3/4" down and just tapered my eyeball curve back to the original shoulder points. I might have been able to cut a little deeper except for my design. (Don't cut that off...).
Then I wonder clipped my neckline back onto the binding right on top of the serged edge.
I matched the centerpoint of the shirt to the binding centerpoint and also about 3" up on both sides of that. The binding is smaller than the shirt so you have to stretch the binding as you sew.
I basted it on with a 5.0 stitch on my pfaff. Looked at it. Awesome. Then I took it to my serger which had to be re-threaded in a dark color. I used black as I don't own dark brown serger cones. And I re-serged that seam.
All of these hacks took less than an hour to do. Yes. An hour.
 |
| Time Flies on the logo |

The hem is a little long and I might change that, but since I'm working overtime, I haven't had a chance to wear it yet. Trying it on - it fits! So much better.
The most difficult part of t shirt hacking is finding the right fabric to coordinate.
Thanks for the shirt, Janine!
The camo knit matches so well, no one will be able to tell that I custom tailored it to my body.
***December 2016 update. This shirt is so soft. It was worth fussing around for an hour to make this fit me. None of the cut/sewn edges are curling, nor are they bugging me.


That is great that you could make that wonderful t-shirt fit you better. You're pretty amazing! ((hugs)), Teresa :-)
ReplyDeleteThat looks a-maay-zing! I love it!
ReplyDeleteI didn't realize men's tshirts fit different than women's. I should have though. I have a favorite tshirt from Crater Lake that is a men's shirt and always chokes me around the neck, so I don't wear it often, even though I love the design. Maybe I can redo the neck as you described.
So glad your shirt fits now!!
Go look at my pin for a confidence booster.
DeleteThat looks like a GREAT hack!!
ReplyDeletep.s. and a fun shirt design. I am seeing more of the sewing machine type designs popping up on IG a lot. Tempting to buy a whole slew of them for the gym.
DeleteGreat job altering your t-shirt, Kathy. Godet is a new word for me, as is the pronunciation.
ReplyDeleteFab! Xx
ReplyDeleteHi Kathy, I've featured your t-shirt hack today...
ReplyDeleteLove it! I'm going to try it since I can't find a t-shirt I feel right in...
ReplyDeleteThank you!