30 September, 2016

Being A Portland, Oregon Tourist With Parkinsons, Part 1


St. Josef's Winery

Woman's Forum Viewpoint - Crown Point

Vista House - Crown Point
 I had the pleasure of playing hostess to my host-sister from Finland this last week. I was an exchange student there -- a few years ago :-). I managed finally to get back to Finland four years ago and this year, Maria returned the visit coming to Oregon to see me.

Maria and her fiance, Asko, came a couple of weeks earlier to ride Route 66 on Motorcycles. How cool is that?  While Maria has been to the states before, they hadn't been to the hot, dry, states before (Oklahoma, New Mexico, Nevada, California).
Oregon was a relief with all it's greenness.

They traveled from Chicago to LA on Harley Davidson Motorcycles. At home, near Helsinki, Asko drives a Honda Gullwing and Maria just bought a Honda Shadow. A bit different than Harley's.

Anyhoo, Asko has Parkinson's Disease. He can drive motorcycles, and ride a bike, but has trouble walking far. My traditional Oregon things to show guests involve a lot of walking. We needed to adapt our Oregon Tour.

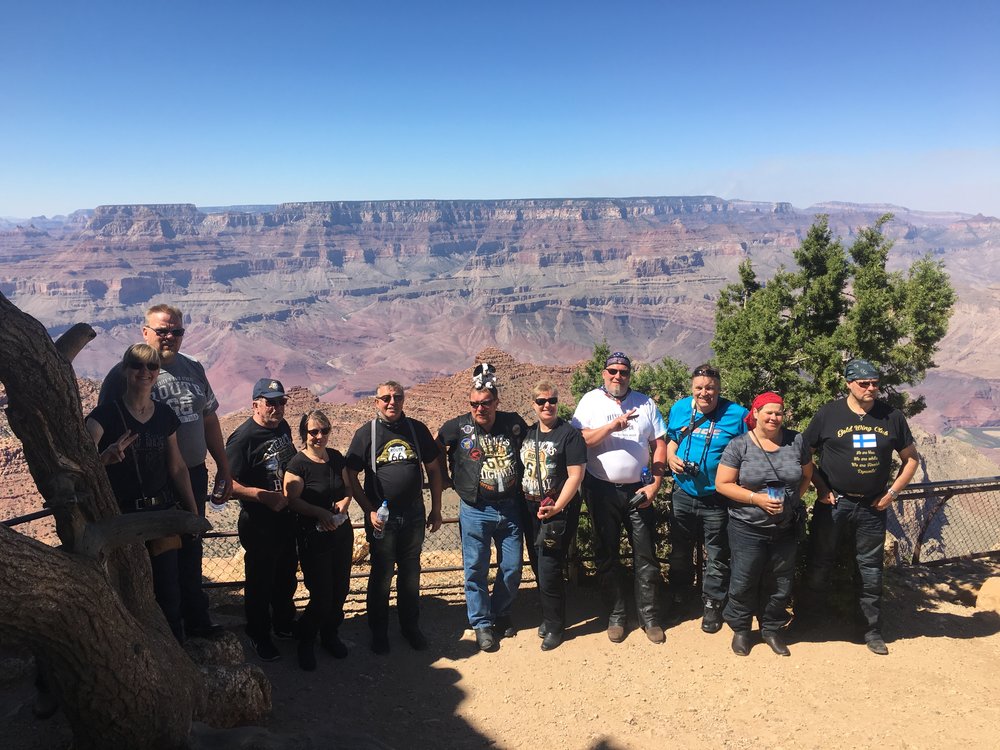
There was a worldwide Parkinson's Disease Convention here in Portland the weekend they arrived. After picking them up at PDX, we drove to downtown Portland to the convention center and had dinner nearby at the Altabira Roof Top Restaurant. Where we met up with their Parkinson friends - all 14 from Finland! It was a seriously awesome dinner with my non-existent finnish (I've forgotten so much)  and they all tried out their english on me.

I could see the different levels of Parkinsons. Some people had suffered with it for many years (Asko - 19 yrs) and others had the fast evolving type.


https://static1.squarespace.com/static/55096406e4b04f21c19e9dd5/t/57df7d505016e1d637277aa4/1474264920180/?format=1000w

There are multiple finnish tour groups coming here to the states to ride motorcycles.
And kitschy Route 66 is a favorite.


Shepherd's Dell Waterfall


 Sunday was our first full day so Maria and I left Asko with my husband while we  went and did some shopping. They hadn't had the chance to buy souvenirs while riding. We live near the Woodburn Outlet Malls and all my European visitors love their brand names.


Being Sunday, there were a few airplanes taking off from our airstrip (to breakfast or wherever) and Asko helped my hubs in the hangar. I should mention Asko has limited english but can understand more. He was happy to have a down day and not go shopping.

Serendipitously,  the nearby winery, St. Josef's was doing their annual grape stomping festival this last weekend.
Maria and I tasted the harvest, took a tour (I was much busier on Instagram this week - RocketGirl50), and bought a couple of bottles as gifts for her mother and for us to drink during the week.

On Monday, we drove up the Columbia River Gorge to Multnomah Falls. This is probably the number one tourist attraction just outside of Portland and it's relatively accessible. We borrowed a folding wheelchair from the senior center just in case and ended up not using it but it was nice to have it just in case.


If you catch the old highway just outside of Troutdale - I think it's exit 22 Corbett -- it's a very scenic drive from the car. First up is the Woman's Forum Viewpoint where you can see up and down the gorge. Very accessible by car with less than 10 steps to view amazing.

Looking west down the gorge, you can see Portland, and looking east up the Columbia, you see Crown Point. Our little jewel on the mighty Columbia.

The highway is celebrating its 100th anniversary this year and was blasted out of the rocks lining the gorge to create a picturesque drive. It has suffered periodic landslides and was completely revamped several years ago. It's lined with

We then drove to Vista House at Crown Point. Some stairs, but accessible for Asko. Parking is quite close. Maybe 100 steps to the doors of Vista House. Inside to see all the marble work and art deco architecture.

Along this highway are many year-round waterfalls. Multnomah Falls is the second-highest in the United States but there are three others  that are easily viewed from the parking areas. There are several that need to be hiked into.

First up was Shepherd's Dell. You could do a short hike to the pool or just look from the bridge.
All of these waterfalls have a parking area along the road around each attraction. It's nice to get princess parking, but if you don't, the walking distance  is not great. (finally caught up with my photos on this post.)

Shepherd's Dell Waterfall. We are actually across the road from the falls. We crossed to see way down below some more pools and the gorge view.

Wahkeenah Falls


 Most of Wahkeenah Falls is visible from the road. Very pretty.

My son has hiked up to the upper pool to take really awesome photos in his IG feed. Hiking is available everywhere but on this drive we are focused on the accessibility.

Depending on your princess parking abilities, its 100-200 steps to the bridge. Alternatively, you can let passengers out at the bridge. Most drivers are kind enough to wait if there is traffic.


Wahkeenah Falls. Discussing  fir tree growth. These are like third generation firs. Most of the big ones were cut down a hundred years ago.


 Driving on, we come to Multnomah Falls. This one is tricky. Parking is what it is. If you come via I-84, you have to walk a long ways. Local's secret is to come via the old scenic highway and you get to park nearer. Still - I had to let my passengers out while I waited for a spot to become vacant.

This is where we thought we might need the wheelchair.
Everything is wheelchair accessible up to the first viewpoint.  Including the ramp/walkway from the I-84 parking lot.

Multnomah Lodge is not. The Lodge restaurant is upstairs - which Asko did well on. The gift shop is too crowded for accessibility although they do try. Good thing Asko doesn't like shopping - lol.

I would say the walking from the road's curb to the lower viewpoint is about a football field in length and slightly uphill.


 Late September, the falls are on the thin side.
Multnomah Falls is fed by underground springs as are most of the waterfalls up the gorge.


Multnomah Falls is always crowded with tourists seeking pokemon as my sister noted.

So it's more dodging unsuspecting tourists that makes this difficult to navigate. Asko managed quite well. 

We ate at the Lodge Restaurant which has some beautiful architecture. The Salmon burgers were very good.


Bridge view.
 Maria and I hiked five minutes to get to the bridge spanning the falls. You can go further to a even more up-close viewpoint but that takes a while depending on the amount of tourists trying to push you over  get by you. There are a few bench seats at the lower viewpoint which Asko sat on to wait.


People push strollers up here so it's conceivable that you could push a wheelchair. Not sure I would want to. This short trail has about five switchbacks to help you gain elevation.


Horsetail Falls


 This is one of my faves - Horsetail Falls.
You can jump in over at the sides, you can swim, you can take your shoes off - it's gorgeous. Beautiful.

Horsetail Falls is also right beside the road. Parking is closeby. 100-200 steps to bridge view.


 I'll be back to throw some more traveling with Parkinson's Disease photos at you soon.

27 September, 2016

Sewing Ideas On The Passport Wallet - Final Post

Travel Set of Purses

If you are one of my regular readers, this post is super heavy on sewing stuff. I wanted a place to put all my hacks so I can remember how to do them again.

My dd is traveling to Sweden and Finland and I decided I would sew her this set of travel purses so I could avoid looking at photos. She needs the photos because she is visiting some of the relatives from there and it's helpful to carry photos.

Photo avoidance is my middle name. Even though I take a million photos a year, I hide from them. The ones that get into the blog are the lucky ones, the others go onto obscurity and forgotten place names. It's embarrassing - but I will say, when I procrastinate, it might be my super power - look what I made!


First make was a Two Zip Hipster, a pattern by Dog Under My Desk (Dumd). I love this pattern. It's so easy to switch it up. I made a Pendleton one for my Japan trip and widened it out a wee bit. Just over an inch.
The Pendleton Wool was thick and adding a little over an inch to the sides gave me the extra room I wanted. I felt the depth was perfect.

For this version in Cork, which isn't as thick as wool, I think I could have gone back to the original size. And I get a chance to do so. I have an order to make another - woot!

For the strap, I used one from a garage sale purse. Well - I used it first on my pendleton. It's beefy webbed strap that perfectly offsets the pendleton and the cork. Not sure what I'll do for the next one.

For all my two zip hipsters, I add a zippered pocket to the inside making this a very secure traveling bag with the cross-body strap. I don't put the slip pocket inside anymore.

Otherwise, I make as directed with Erin's excellent directions.


 2nd; The Coin Purse.
This came in handy in Japan. I didn't have one with vinyl though. In Japan, you see a lot of coinage. You want to move the lower denominations on as quick as you can or you can easily weigh five pounds more.

I started with some rough cut 5 x 6 inch pieces for the back and quilted them. This gives the coin bag some substance if it does get full of coins. Alternatively - you could interface but I like the diagonal quilting lines. I've done this little bag a couple of ways and totally forget each time how to hide the seam.

This is what I did this time with an exposed seam.  Make the quilt backing. Cut vinyl roughly to 4 x 6 inches.   I butted the vinyl up to the lower teeth of the lace zipper and top-stitched the zip in place. On the top side, I used an inch wide scrap of cork and top-stitched the zip in place.

I trimmed everything down to 4 1/2 x 5 1/2- or so. Then I sewed around the entire outer edge. Then I zipzagged to finish that seam. Turn and top-stitch. Whenever I was sewing on vinyl, I just laid the thin paper that comes with (or tissue paper) and then ripped it off once seam was finished.

Neither my daughter nor I are super frilly girls. I think this lace zip gives this small bag a feminine vibe without going over the top.

Oh - and I forgot to add a d-ring. I took another scrap of cork and just sewed it on top of everything and I love it.  I'm in love with cork now - almost obsessed. It doesn't fray, it's strong but lightweight. The texture is amazing. And you can add a strap attachment on afterwards.


And Finally - The Passport Wallet.
Up, Up & Away
This is a pattern by Liz of Moments blog and this is her pattern design name. She's tested a lot of bags and learned a bunch of tricks.
You can find her pattern on Craftsy.

This is a big Family passport wallet holding 4 -6 passports.
I just wanted one for my single daughter.

I've made a passport wallet for me. This one went to Sweden, Aland Islands, Finland, Estonia, & Japan.
This one went to Ireland and
Schiphol Airport.


When I designed mine, I wanted something small for airport screening. It would hold my passport, 2 -3 credit cards/drivers license and some EURO cash. And this worked out very well for my needs. But it doesn't hold Japanese Yen flat nor American dollars flat.

Fast forward 4 years; I would have to find my notes on my passport from then or open the PDF file on my computer with Liz's Passport Wallet as a starting point.

I thought about this new pattern for a good three weeks before I started cutting. First of all at 9 inches tall, it's big. I wanted it a tad shorter. Liz offers a zippered pocket alternative for the right hand side - this was all good, but I had to size down on every little pattern piece.

80% solution: I printed my pdf out at 80%. 


I wish I had known this before I started but I'll say it here. This design has you make the pocket pieces, then have you sew them to the lining, then you sew right sides together and turn.
Make your pockets but don't cut the lining and main fabric yet. More on this later.

For my zippered pocket, I wanted to be able to put my iphone inside the back slip pocket so the pocket needed to extend to the edges to accommodate my phone. More calculations. Did you know there are websites that will figure out what is 80% of 7.2"?


The left hand pocket will hold three passports plus one business card slot. In the pattern this is repeated onto the right hand side. For a total of six passport sized slots and two business card slots (driver's license).
Right now is good time to go into the problems in this pattern.  If you have aspirations of becoming a pattern designer; things to reflect upon.


#1. Take good photographs with high contrast fabrics and contrast top-stitching. The left hand pocket is made from five pattern pieces that look identical with similar sounding names and all in blue on the pattern. Was I confused?
#2. Use photoshop or something to name things in your photo.
#3. For similar sized pattern pieces, using the alphabet might have  saved me some time.


 Liz's written directions are excellent. Just her photos need some work. If you cannot figure out how to place each of the five similar sized pieces then just trust the directions. Erin from Dumb patterns labels each photo with step # so you know where you are. (#4. Link steps to photos)

After figuring out the left side pocket 'bag', I tackled the zipper compartment. This is constructed to enfold the raw edges so this seam allowance isn't cluttering up your outer seams. I thought it was genius on how to attach the slip pocket behind the zip pocket. And there's two behind the zip - one for your phone, one for bills.

My iphone measures 7" high so I needed that slip pocket to be 7 1/2" or so. It's all on me making this way more difficult but I wanted the option.
I also wanted some credit card slots on the front of the zipper bag. This was easy to do when installing the zipper -- when it's still all flat.


Before you cut your main and your lining, lay your pocket "bags' in place.
I found I needed to add 3/8" in height to accommodate the "bags".
Your goal is to be able to sew  RST together without hitting the "Bags". With the exception of the left hand side of the the passport pocket which is sewn into the seam.  You also need some room to top-stitch. Using your needle in the far left position will help keep the top-stitching even - the pocket "bags" are vying for room and they push back.

I like her hint of trimming 1/4" off the lining and easing it in when sewing RST. It helped keep the lining from getting baggy.

This is the time to put in your magnetic snap on the outer piece and also on the inner lining.
Do you need to embellish the outside? This wasn't covered in depth as the original pattern uses velcro. She has you go elsewhere to get directions for magnetic snaps. No problem for me.


This wallet finished up about 8 inches high. Enough to easily hold my iphone. It's more typical wallet size than the original patterned one at 9 inches.


Overall, I liked the pattern. It had some genius tips and if you're keen on reading directions, this pattern is an A+. The photos don't give you visual clues on the multi-layers parts and make this pattern an Intermediate sewing pattern.

I had this discussion with one of my FB sewing groups about where to put alternative construction ideas. Place them with the pattern. For the zippered bag on the right, I had to go somewhere else and print them and try to segue them into the general directions. None of her pages had numbers making this a fun project if the wind got to them. It's not like it's a paper pattern. Its a PDF file which can be updated. There could have been page numbers on the directions but my computer did not print them. #5 Number your pages prominently.

I nearly went crazy with trying to figure out where I was in the pattern because I was doing some sewing hacks. Part of this is my fault (for not sewing things as written. )

"...If you have chosen the zipper pocket version.. attach your zipper pocket to the right side now as described in the Double Up Passport (page 9)...."
Gah - where's page 9?


If you only want one side for the passports, you go to her Upgrade pattern, but you don't cut out all the pieces and since they all look alike, I would add
#6 add cutting diagrams like on old commercial patterns. A pen and ink drawing.
Cross-hatching to indicate the main, the lining, the coordinating fabrics. Cutting diagrams for each variation of the wallet would have been fab.

 I wanted my pocket on the left (passports) to have an second fabric in the middle but I was unable to replicate. I tried. She gives written directions on how to do it. But the photos were no help. I did manage to get my third fabric (coordinating lining - running short of my two main fabrics) in the correct no-show place though.


This hacked wallet will hold three passports, one piece of ID, two credit cards, Coins in zippered compartment, paper bills and smart phone. It's gorgeous in cork.


I just noticed in researching info for this post that Liz has another Big Pocket version here. This version is more like mine to accommodate the big phone and extends the entire height of the wallet.

This would put those seams into the sides seams of the finished wallet, adding  some bulk. It would have been easier...
Some of these notes are here just to make my life easier if I make this again.


****update -- Dear Daughter just received them up in Alaska and loves them. Be still my heart.
This is the last post on these travel purses. Thank you for bearing with me and reading so far.

I've had guests all week from Finland with no time to blog but I did take another million photos so I will try to share some soon.

All photos for dd have been put in the Shutterfly queue. Sigh of relief.

23 September, 2016

Travel Purses; Passport Wallet Finished


I've got another post planned on this trio of travel  purses with all the pattern info and my hacks in one place. For right now, it's getting mailed today up to dear daughter for her upcoming trip to Sweden and Finland.

I am still hiding from my photos as she will be visiting some of the relatives there as well as possibly one of my friends who is visiting ME tomorrow! 

The travel set consists of a messenger style bag, a coin purse, and a passport wallet.

The Messenger style bag is sewn without the flap but with a recessed zipper to keep items secure while in strange places. It also contains a zippered pocket inside for extra security. The two outside pockets  stack on the front - one zippered, one a slip pocket.

The coin purse was my own design but loosely based on some small bags sewn during BagIt, hosted by ElmStreetQuilts last November. BagIt for 2016 has already started and will go on for three months this year.

The passport wallet is from a new-to-me pattern but was seriously hacked by me. I downsized the wallet to 80% of original. I added some credit card pockets inside and I also added the alternative pocket option. It also fits my IPhone6. I'm showing it with my old android which is a bit smaller.

I like the concept of this wallet but it gave me 2am nightmares trying to figure out the next step. Now that I've sewn it, I love the concept. You make what type pockets you want, then cut the outside and lining so those pockets will fit inside. Definitely my style of sew as you go.  I'll be blogging more about the pattern difficulties later.

On the main bag, I like the length of the tassel but it was a trial one out of thinner fabric. I may re-do the tassel but my brain says it's done.

I don't know if dd will want to carry all these as she usually travels via small backpack. I think she will like the passport wallet as I like to have my drivers license/ID and passport in the same place and readily available for airport screeners. She probably won't need to pull it out too often. In Japan, I felt like I was showing my passport about five times a day.

In other good news, one of my cousins saw the bigger bag/purse and ordered one exactly like it for herself. Thank you for helping to pay for new cork fabric addiction.


21 September, 2016

Travel Purses; Part Three


The Passport Wallet.

This is just a teaser post as I'm running amuck with house guests arriving Saturday and my awesome work schedule getting in the way.

The bathroom is cleaned and it will just have to stay that way until Saturday.

Here's the first post in my Travel Purse trio.

And my second with the coin purse.

This wallet has been placed under my mattress to flatten it out and set the folds.

18 September, 2016

Sandra's Snowman


I am supposed to be sewing the third item in my daughter's travel purse trio: the passport wallet.

ahem.

Easily distracted by super quick and easy, I was derailed by this cute snowman drawstring bag.
A tutorial is over here on Sandra's blog.

The most difficult part is trolling the button stash for big black buttons. You'll need seven of them. None of mine match either. (you could use felt instead).


One of my favorite businesses near my old work place is Garden Gallery Ironworks.
They were giving away teeny white pumpkins and hop vines. Cut your own. In the rain.

At their shop, I spied this most awesome wine shelf featuring a biplane!
It has holes for four bottles of wine, appendages to hold your wine glass collection AND it's a biplane. BE still my heart.

Last night I wandered around the house looking for a 36" wall space where I could hang this shelf.  The shelf sticks out about 8 - 9 inches. I found the perfect spot in the dining room but hubby is looking at me askance.


Hop Vines: Commonly used in beer making, they are also perfect for fall decor. I have another friend who uses them dried in her wedding bouquets she creates and also in the boutineers.

I stole a couple of photos to show her awesomeness.
She's mostly on Instagram: BohemianBouquets
(also on Facebook).


16 September, 2016

Travel Purses: Coin Purse

 I sewed this coin purse to attach to my daughter's 2 zip hipster bag. For this little purse, I brought out the lining fabrics. On this side, you can see Alaska - where she currently lives.

On the opposite side is a street map of Paris with the Eiffel Tower. DD traveled there a couple of years ago along when visiting Budapest, Germany and England.


 Cute and tiny. This coin purse is about 5 1/2  inches wide by 4 inches tall. On the front is a piece of vinyl to easily see which coins you have 'collected'.
 

I even found her some Swedish (Sverige) coins as well as my paltry collection of Euro coins and her more substantial stash. We can't spend Euros here in Oregon  - so take them back.

The bling includes a Eiffel Tower frippery (Daiso in Japan! Yay!) and a lace zipper.
 There are a couple of scraps of cork to pull the set together.


I am still hiding from those photos and getting addresses for DD.
Sewing is sew much more fun.


Part one of Travel Purses is here.