Showing posts with label tutorial. Show all posts

07 May, 2020

Clothesline Bowl Tutorial


I've had a difficult time being creative right now at six weeks into our Oregon pandemic of Covid19. 

But a couple of FB sewing pals kept pushing and I designed something instead of just doing rote, run-of-the-mill making.

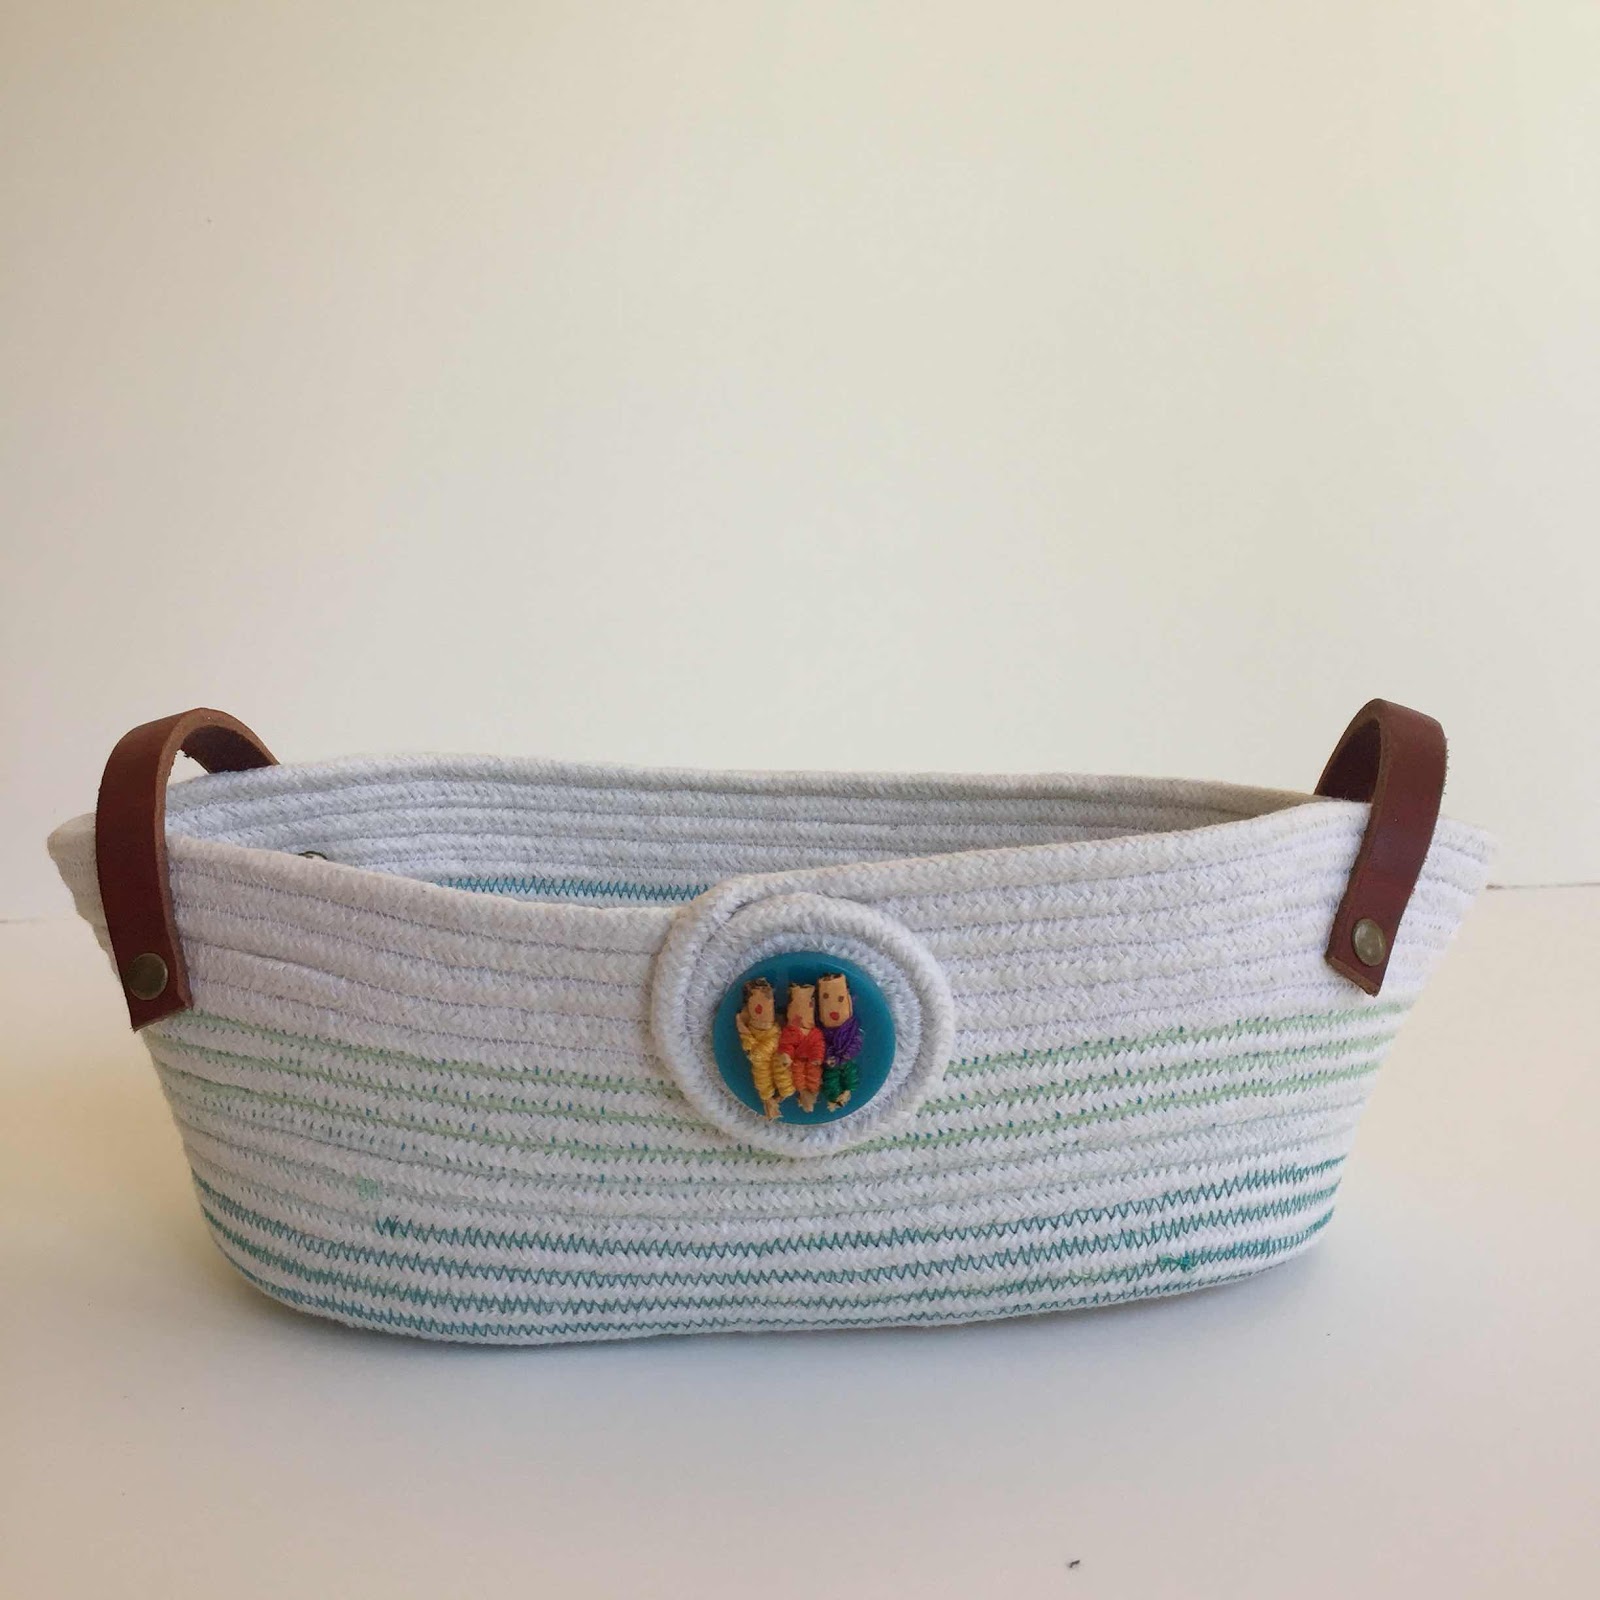
This bowl is oblong. I think it is easier to start with a circle. The oblong can be a bit unwieldy when starting out to maintain that oblong shape.

I use Cotton wrapped clothesline with a poly-core. 100% cotton can get limp. A work-around is denser zigzagging. I added a photo of the rope I typically buy at the end of this post.

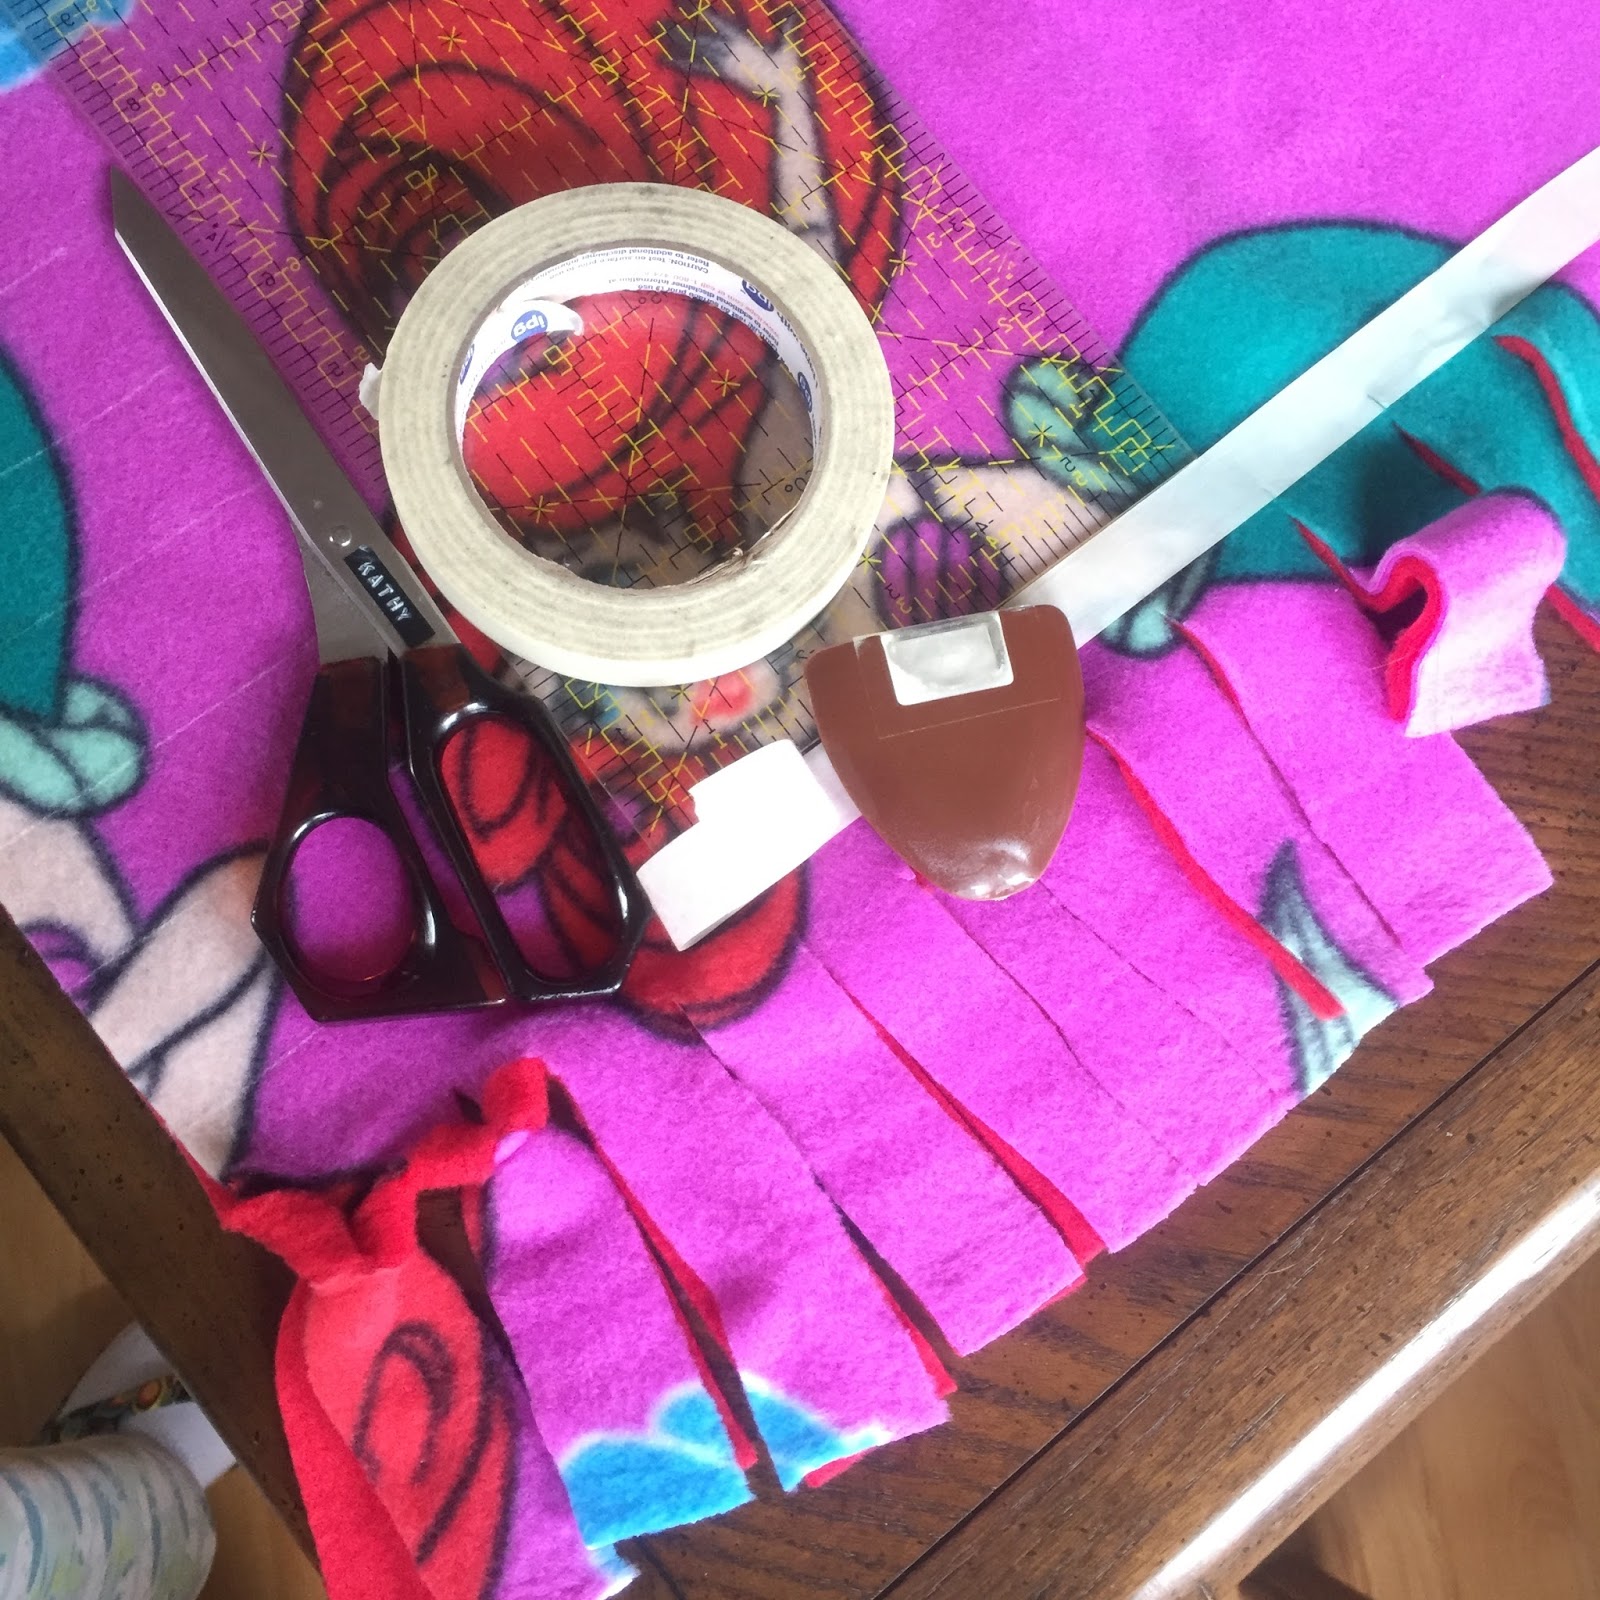
A microtex 12/14 needle. Some people recommend a jeans needle. The only needle I've broken was when I tried to sew thru one of my anchoring pins. Do clean out your machine after bowl making - lots of dust fluff.

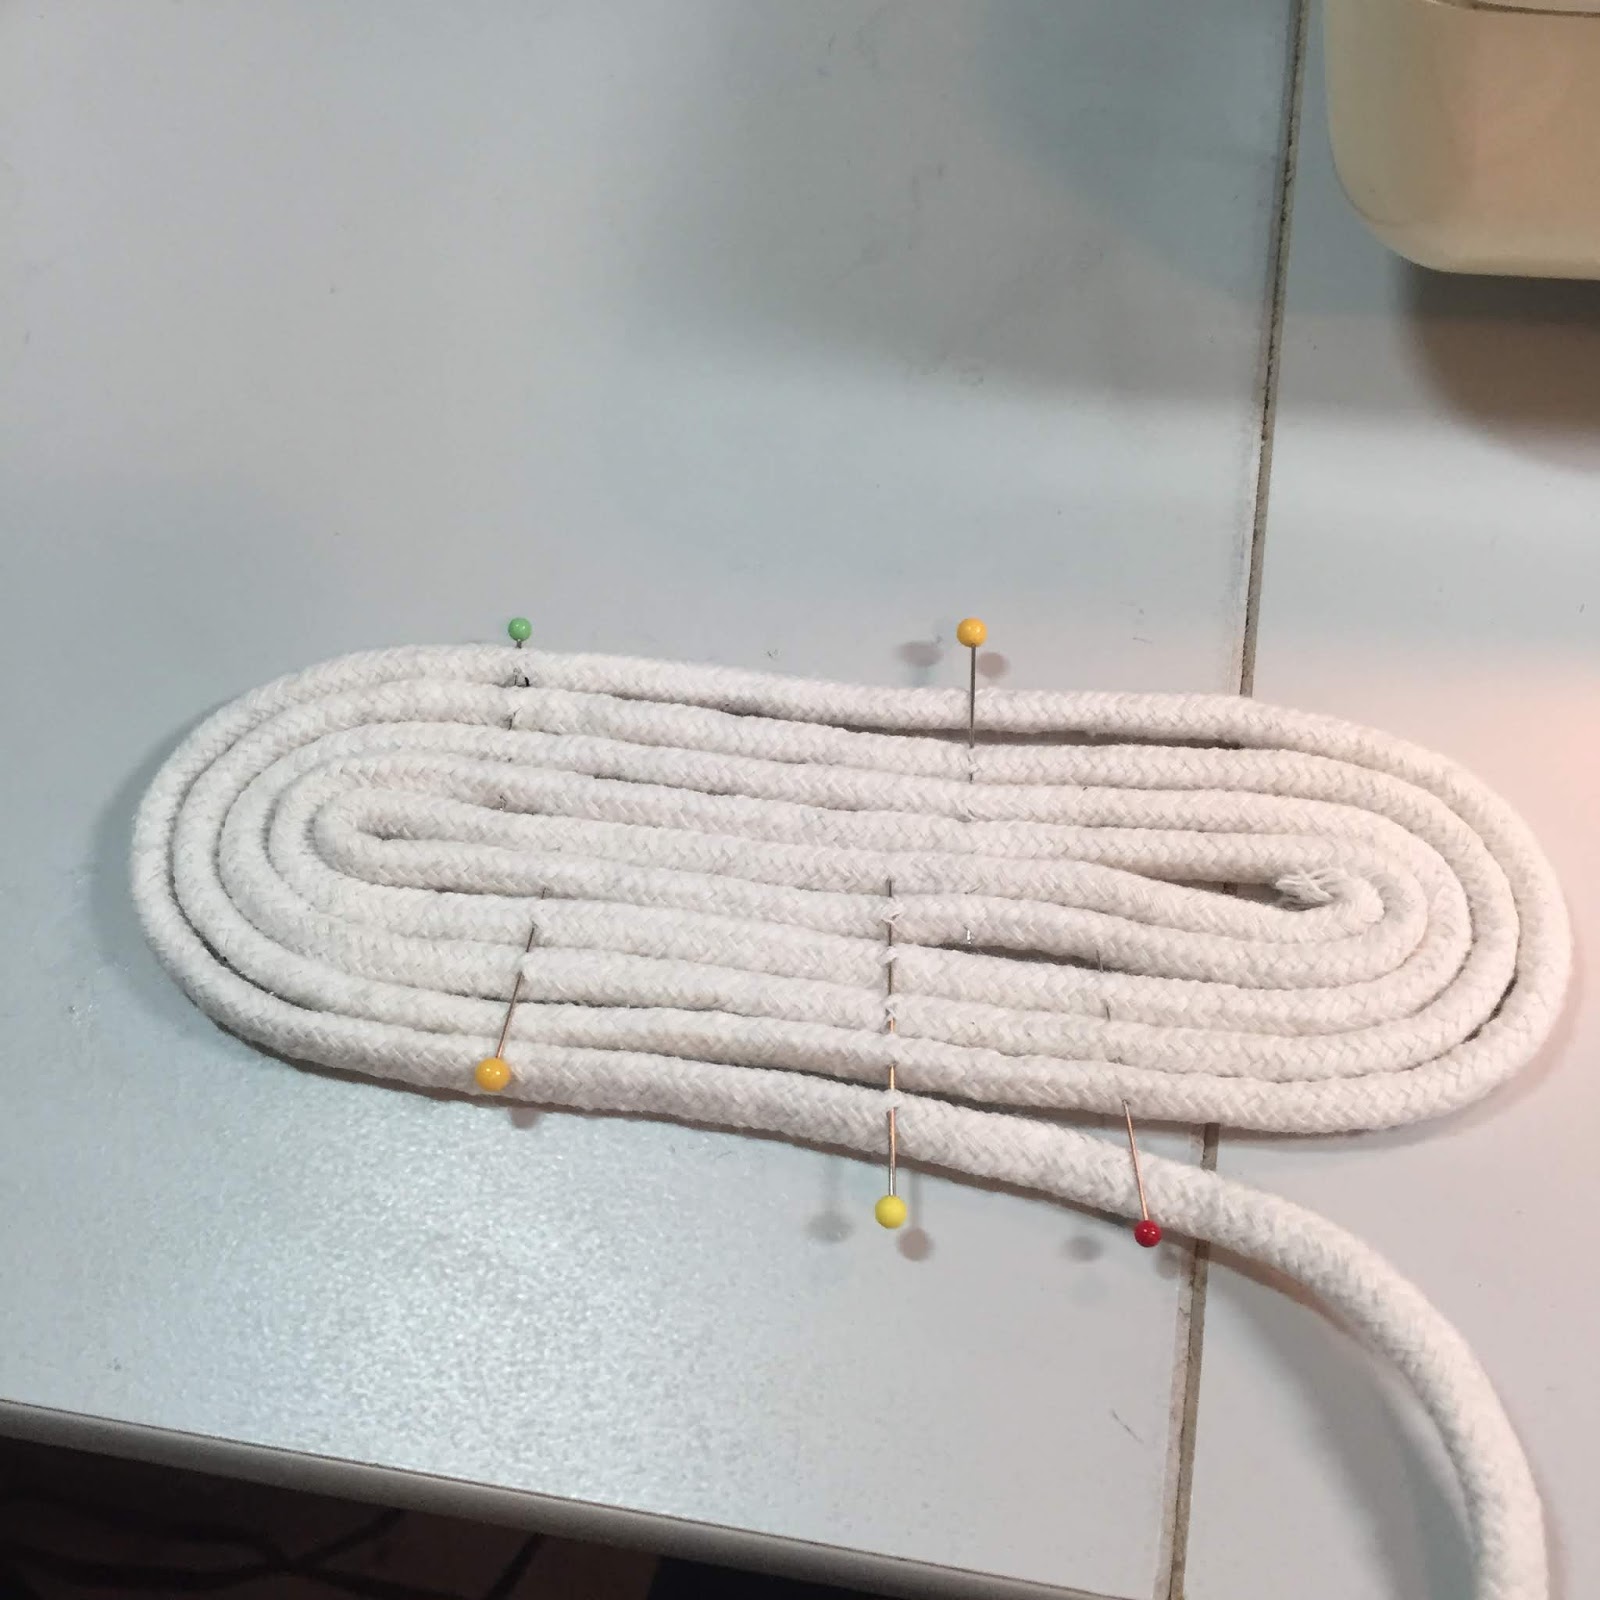
To start, wind your rope around on a flat surface until you get a circle or oblong about 3-4" wide. Stick straight pins at intervals to secure it while you begin. Most  rope has a poly core, so stick pins in just at the surface. On circles, I put a pin in at 12, 3, 6,& 9 o'clock positions.


 Once you have it secured, feed it under your presser foot so rope feeds off to the right towards your lap. 

We're going to use a wide zig zag. Maybe 4.5 - 5 mm wide for the Zig and 3.5- 4.5mm for the Zag. On my Singer Stylist, I used a 5 (no mm then) and a 12 for the Zag. You want it wide enough to catch both ropes and enough Zag to hold it together.

When using thread as color, by making the zigzag more dense (or closer together), You get more color. 

On this oblong, I also pushed my first rows together as I zigzagged. Not necessary on circle as much.

 I start in the center. On this oblong, I zigzagged twice down the first two rows.  On a circle, I may do a cross in the middle in a natural/white thread until it feels secure.

You can also do the entire middle with white/off-white thread (which hides everything)


Once, the middle is secure, I start zigzagging in earnest, moving pins out, then back in after I pass. Pivot at the tight points.

You can see below -- I started removing pins altogether once I did four or five rounds. The pins help with shifting as you start and stop on the middle tight curves.


On circles, I start pulling up the base to do the sides around 6". That's on my pfaff machine. I noticed on my Singer Stylist that the machine is skinnier on the left-hand side of the machine, allowing you to push up more evenly right away.

On this bowl, I started tipping it up around 4 1/2" wide.  Once you start tipping, you want to keep your hand fairly steady on the angle. By tipping, I mean nearly straight up.

You can also see my presser foot is centered between the two coils for the zigzag to catch both at same time.


The thing I like most about these bowls is allowing my creativity to run amuck. I do keep a pinterest board on Rope Bowls (K8Hobbies), but that's mostly for finishes. Like - what kind of knot do you want at the end?

My thoughts, oh, blue looks nice, what about a blue/turquoise graduation. The home decor/gardening rule of 3's and 5's works very well visually. Zigzag three rows in blue, switch color on the bobbin, and stitch three more rows, or change both top thread and bobbin thread. Go wild. Sew until the bobbin runs out.

This is actually a great time to use up partial bobbins and nearly used up thread spools.

Or, do the whole thing in off-white thread. 


Oblongs can get wonky pretty fast. Whatever pressure you use on one end, you want to do the same on the opposite end. Get yourself into a rhythm. If you stray (cuz you got hypnotized), you can go back with natural thread and re-stitch. I promise no one will ever notice. And if your zigzag lines aren't perfectly parallel? No one has ever noticed.

Use the time of changing threads to stretch a bit, roll your neck, etc.


In this photo, I am actually pulling it away from the machine. If you want perfectly straight sides, the bowl needs to be perpendicular. I wanted my sides to taper out just a wee bit.

My inspiration bowl is below. I did pull it up at this point to see no thread color on the top rows (5+). She finished it with a round coil.


Photo credit - Lisa Maestas


 Getting close. 


Forgot to take photo of coil finish. I marked the centerline of the long side to zigzag to and just a wee bit past. Then I cut my rope at another 12" or so..

I pinned my 12" into a round coil with straight pins and zigzagged the coil while it was attached to the bowl. Yes, it required some machine acrobatics. I did this with off-white threads. It won't show anyway.

Then I eyeballed the coil against the centerline of the long side and pinned it in place. My button embellishment is actually an earring. I attached the earring  and hand-tacked the coil  down. I glued the earring down later. 


I also wanted the leather handles riveted on. In the above photo, I eye-balled my strap placement, then folded bowl in half to make sure they were even.

I've also used cork scraps to hide the end of the rope. Tied the end into a monkey's fist knot and stitched that down. You can search my blog for rope bowls or clothesline bowls to see past posts (Full web version, not the mobile version).

These are so easy to sew. You have complete do-over capability if you lose your way. If your coils are separating because you strayed with your stitching, go back over the area.


I buy this locally at Wilco Store with has a Tru Value Hardware store inside. I like 1/4" width. I sometimes use 7/32". I have some 3/8" rope I might try soon. 


29 December, 2017

Simple Round Clothesline Bowl Tutorial aka Rope Bowls


 You will need some cotton clothesline. Some clothesline comes with a polyester core and some without. Your bowl will be sturdier with the poly core. There is also polyester cord aka paracord but it doesn't give the organic look regular old cotton clothesline does.
I used 3/8", 7/32" & 1/4" inch clothesline.

Your basic sewing machine with a zigzag stitch.

Size 14 sewing machine needle.

Neutral threads -whatever colors you want to use up.
This tutorial is just for a basic bowl. Any color comes from the thread.

2-5 bobbins filled with thread. This is actually a great time to use up those bobbins that are partially used up. Whenever your bobbin runs out, get up and stretch.


 I start coiling the rope on itself, utilizing four straight pins to hold my disc steady. The pins won't penetrate the poly core so just skim the pin thru on top.

I  clip a wee bit of the core out and smush the cotton fibers close. You can also utilize some glue/fraycheck to help.
 Wind until you get a 2 inch disc.

 To start a circular bowl, you'll need to wind your cord in a circle and stick some straight pins through from the side to secure. Then carefully start zigzagging so the stitch catches both coils.
At the beginning,  take two stitches, lift your presser foot, pivot, and sew another two stitches and repeat. At about 2 1/2" wide (see photo) you don't have to lift your presser foot so much and can start feeding it through on the curve.

I tried to sew over my pins at the beginning and ended up hitting one and breaking my needle. This is really the trickiest part of making the bowl. Keeping the bottom coils flat enough as you zig zag in stops and starts. Maybe pull your pin out enough as you pass and then stick it back in. The pins are only there for a few rounds.

My machine has a needle down button. The needle stays down while you pivot the disc.

My zigzag varies according to the diameter of the rope. You'll need a wider zig on wider cord. Mostly, I'm somewhere around 4.8 - 5.0 in width.
The zag is set around 4.0 - 5.0 length.

Some tutorials have you do a cross on the bottom disc with your zigzag stitches. They mostly don't show unless you are using up strong colors.

I tend to criss-cross the bottom with my zigzag until I feel it is secure. Moving pins in/out as they get in the way. Then as soon as I can see clearly, I start zigzagging around the circle joining two coils together with the zigzag stitch.

I also have my disc with the coil feeding off to the right towards me. If it goes to the left then you can stop and cut threads and flip it over to match the photos above.

Remove the pins at about 2.5". Or when you don't need them to help hold things steady.

The neutral threads don't show. If you can't sew a straight line, this simple project allows do-overs. Just sew again - right on top of your wayward stitches. They won't show, I promise.

When I first started making these bowls, I would occasionally wander in my stitching as I did the endless circles. Easy fix - just make sure thread in bobbin and spool is neutral colored like the clothesline. No one will notice.


For most bowls, I sew a flat disc until 6 inches. Then, I raise the whole bowl against the machine for several rotations. If you want steeper sides, smash that bowl against your machine. Easier sloping sides, use your left hand to gently lift as you sew.


 Sloping sides here. My hand is not lifting as I sew.

 Here is my hand gently lifting. straighter sides result. Straighter? Smush it against your sewing machine - up high.


 A close-up of my bottom - ha! not mine, the bowl's bottom. That first darker teal is where I broke the needle. The second is where I ran out of bobbin thread and started again. The thread tail got caught up in the stitching.


 Here's my wobbly stitching. Which no one has ever mentioned.
Run with it.

How to finish.

Well - you have to eventually. I liked a knot here so I sewed up to the knot as close as I could get and then back-stitched the end in place.

I've seen handles. Holes left purposely to make handles, etc.
You just sew to the place where you want a handle in place and run your zigzag so it doesn't catch the upper coil for 3 or 4 inches (5?). The handle will be a bit fuller than the previous coil so when you want to end the handle hole, you bring the outer coil down with enough give to create a visible hole. Move your zigzag stitch back so it catches both coils.  Continue sewing to the other side and repeat. It probably would be helpful to mark those places with a pin or wonder clip to keep handles at even intervals.

I have a pinterest board with several finishes I liked (K8hobbies under Rope Bowls). Some people hide the end join with a piece of leather riveted on. I tend to just make knots.

At times I hand-stitch my coils or knots down. Have fun and let your creativity loose.

The cotton clothesline does create some lint fluff. Clean out your bobbin case after you make a few.

Fabric-wrapped bowls. Pain in the patuttie. My tip? Skip the long strips. Go with 1.25" wide strips by 3 inches long. Easier to control until you've made at least one. Put a strip here and there. Use some scraps.


Notes on time and other questions:

My first bowl took a solid hour - maybe 1 1/4 hours to make the first one. The smaller one took 15 minutes.

 I had been thinking about it for months. I knew I did NOT want to try the fabric wrapped version. Other than securing the bottom and angling the bowl 'plate' UP at 6". it was very organic. Look again at my Pinterest board. I added some ideas. Odd # stripes is from landscaping and window dressing advice: group in 3's and/or 5's.

You can only sew until your bobbin runs out. I used five on the the large bowl, most of two on the small bowl.

The body hurt is all at the beginning where you are hunched over trying to get the zigzag to catch both coils. When you angle the bowl up and start the shaping, then you can consciously sit tall in your sewing chair, relax, and find your sewing rhythm. My clear foot has two red dots on it on either side of the center 'opening' (toes). I try to eyeball the dots to guide me. Staring at the neutral rope will hypnotize you.

Because of the bobbin changes, it's easy to take breaks. The designing is very organic.


Rope tips;

1. I liked the 7/32" wide cotton clothesline to begin with. The 3/8 (6/32) was a tad more fiddly. It was a different brand as well.

2. In my little town, I have four stores that sell cotton clothesline. Varying in price, thickness, and strength. Buying for me and a few 'skeins' for friend in Japan has emptied the town. Yes, I could buy online. For cheaper. But I feel clothesline is one of those staples that if we buy online, we help close another brick & mortar store. {opinionated}  I made four bowls out of what I bought. I'll wait until someone re-stocks to have another go at it.

3. A wide zigzag of 4.0 to 5.0 is good for catching both cords as you sew the bowl together. Again, the larger 7/32 cording was a great starter.

4. Your white or off-white thread disappears into the clothesline weave. If you wobble off your join line, go back and have another go at it.

5. I have a Pinterest board to help focus my 'organic' rope sewing.

6. While out researching my town, I was tempted by some turquoise para-cord but -- I don't like the feel of the polyester stuff and I can't imagine having a para-cord bowl sitting on my counter unless a grandchild made it and I had to. Neutral, organic, cotton clothesline gave me the feel I was after.


7. Have fun. Use up some thread spools.


For more inspirational photos, you can search my sidebar on the full sized web page for "Clothesline", "Rope" and "Bowls".
(Apparently I am not good at tagging projects consistently.)


19 November, 2017

Elvis No Sew Blankets Mini Tutorial


 My favorite neighbor girl needed help making some christmas gifts.
Polar fleece blankets. No-Sew Fleece Blankets.

Do you want to make your own? They are easy-peasy.
They even sell kits at Joann's Fabric Stores.

There are a couple of ways to tie them. We chose a low knot version.


 You will need two pieces of polar fleece in coordinating colors. Most fleece comes 60" wide. If you want a square throw, then buy 60" cut (aka 1 2/3 yard).

Neighbor Girl wanted them rectangular. She bought two yard lengths of two coordinating fleeces.
Her cut measurements are 60" wide by 72" long.

You can do this on your dining room table to save your back or sit down and lay them out on a clean floor.

Lay your two fabrics together and smooth out the wrinkles until all sides mostly match. On the 60" edges, you're going to cut off about an inch width which is the selvedge. These edges are rougher where the machinery that made the fabric gripped it.

I free-hand  cut the selvedges off. Because polar fleece hides all flaws. You're going to end up cutting fringe all around anyway. Even if you can't eyeball an inch to cut away, it won't matter in the end product.(but if you want to measure or lay out masking tape as a guide, you can).

We laid masking tape (painters tape) down 4 inches from the edge (Parallel to the edge). This was to assist in cutting the fringe. Each fringe (fringette?) is about 1 1/4" wide. I have a chalk marker that worked quite well to guide Neighbor Girl in cutting straight fringe.

She had limited confidence on the first side but by the 4th, she wanted to cut the fringe free-hand.

The trick to the fringe is to cut mostly 4" in on all four sides and evenly. So you might have to curb that enthusiasm of wanting to do freehand as your fringe starts to get wider and wilder.

Anyway, I gave her a masking tape line to cut to and chalk lines to cut straight. We didn't need these on the second blanket because of the elvis stage light design giving us fabric guidelines.

You will also need to cut out 4" squares on the corners as the fringe will fill in the corner and look seamless. I always forget the 4" squares at the corners until I cut the first fringettes. You'll figure it out, because polar fleece hides all flaws.

 Once the fringe is cut, you flip the fringette forward and snip a 1/2" cut in the middle of the four layers. My scissors aren't sharp enough to cut thru four layers with the tips, so my tip is to bring the scissors in and use the middle and/or back of the scissors to give you some power to cut through.

Neighbor Girl quickly grasped how much of a snip to make. Remember, polar fleece hides all flaws. Even if you snip too wide, it will be okay.

Then you bring the end of the fringette through the hole. Tug gently. Thus making a soft half hitch knot.

The other method has you tie the fringettes together in a double knot making the edges of these blankets more lumpy bumpy. This snip in the middle and push the end through method is a much softer knot that doesn't annoy you as much when you snuggle under the throw, but is just as secure.


 This right side has been done. Look at that red line. It's the opposite side as it comes through the slit forming that cool braided border.

One last tip: the fleeces don't shift because of the friction of the material holding them secure. But the weight of the blanket will slide over the table, possibly causing you to cut crookedly. Just roll up the other side to keep the weight of the material from shifting.

See that corner above? It had a 4" square cut out and you would never know.

 It took about an hour to make the first. AND stretch frequently for your lower back if you are bending over. The second blanket was only 60" square and took just over 30 minutes.

I have some video but no time to go through the laborious process in order to post here. You can catch them in my IG feed.


Photo Credit: DD; Cape Kiwanda

 I'm busy making notecards for my kids (who write letters just like their mama and their grandma!).
I'm using their awesome photography from the year from their various travels.