Showing posts with label cards. Show all posts

19 November, 2017

Elvis No Sew Blankets Mini Tutorial


 My favorite neighbor girl needed help making some christmas gifts.
Polar fleece blankets. No-Sew Fleece Blankets.

Do you want to make your own? They are easy-peasy.
They even sell kits at Joann's Fabric Stores.

There are a couple of ways to tie them. We chose a low knot version.


 You will need two pieces of polar fleece in coordinating colors. Most fleece comes 60" wide. If you want a square throw, then buy 60" cut (aka 1 2/3 yard).

Neighbor Girl wanted them rectangular. She bought two yard lengths of two coordinating fleeces.
Her cut measurements are 60" wide by 72" long.

You can do this on your dining room table to save your back or sit down and lay them out on a clean floor.

Lay your two fabrics together and smooth out the wrinkles until all sides mostly match. On the 60" edges, you're going to cut off about an inch width which is the selvedge. These edges are rougher where the machinery that made the fabric gripped it.

I free-hand  cut the selvedges off. Because polar fleece hides all flaws. You're going to end up cutting fringe all around anyway. Even if you can't eyeball an inch to cut away, it won't matter in the end product.(but if you want to measure or lay out masking tape as a guide, you can).

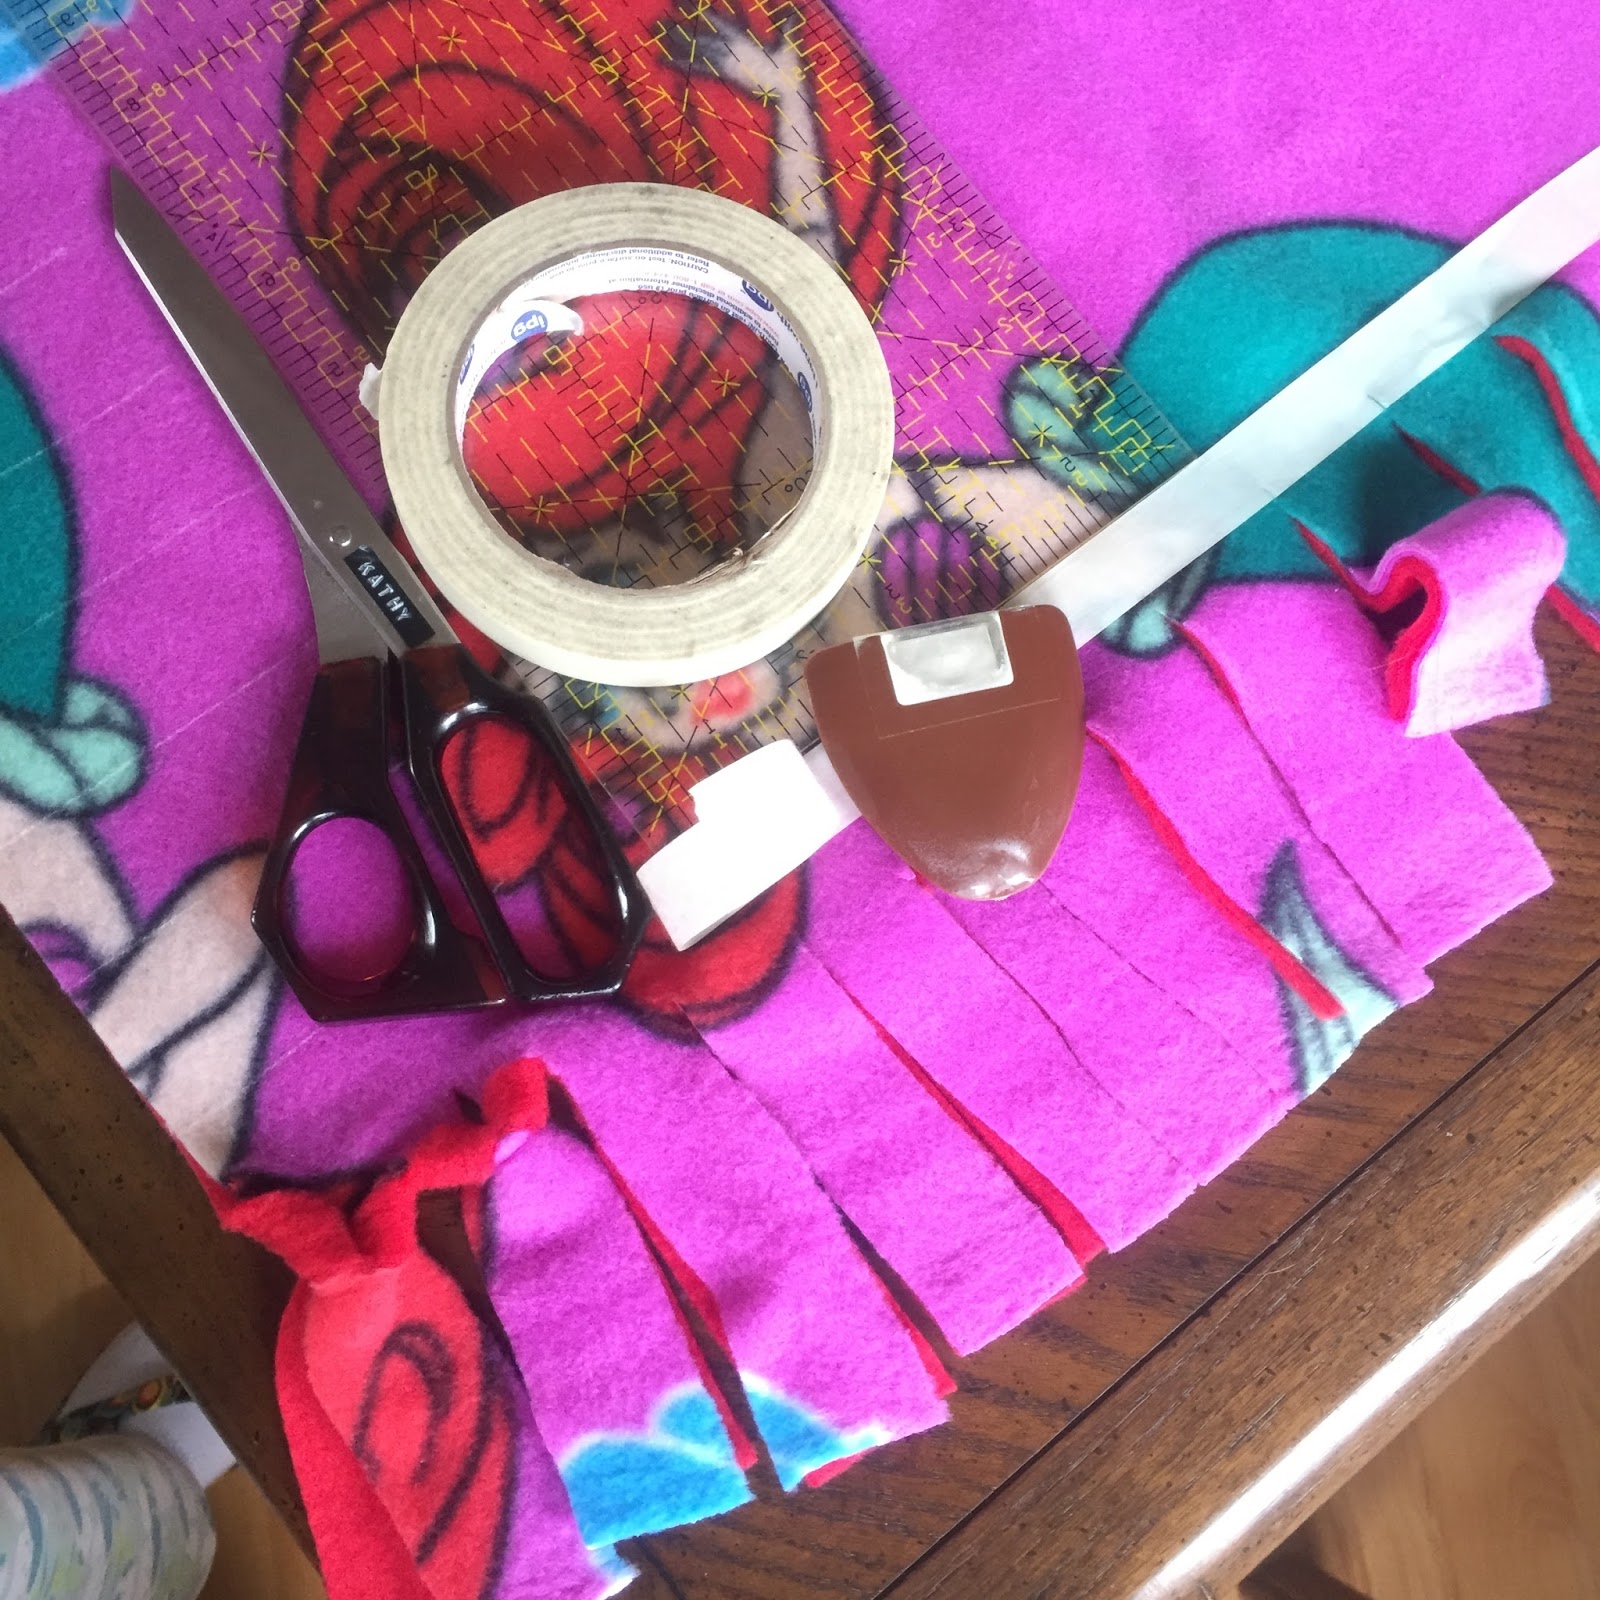
We laid masking tape (painters tape) down 4 inches from the edge (Parallel to the edge). This was to assist in cutting the fringe. Each fringe (fringette?) is about 1 1/4" wide. I have a chalk marker that worked quite well to guide Neighbor Girl in cutting straight fringe.

She had limited confidence on the first side but by the 4th, she wanted to cut the fringe free-hand.

The trick to the fringe is to cut mostly 4" in on all four sides and evenly. So you might have to curb that enthusiasm of wanting to do freehand as your fringe starts to get wider and wilder.

Anyway, I gave her a masking tape line to cut to and chalk lines to cut straight. We didn't need these on the second blanket because of the elvis stage light design giving us fabric guidelines.

You will also need to cut out 4" squares on the corners as the fringe will fill in the corner and look seamless. I always forget the 4" squares at the corners until I cut the first fringettes. You'll figure it out, because polar fleece hides all flaws.

 Once the fringe is cut, you flip the fringette forward and snip a 1/2" cut in the middle of the four layers. My scissors aren't sharp enough to cut thru four layers with the tips, so my tip is to bring the scissors in and use the middle and/or back of the scissors to give you some power to cut through.

Neighbor Girl quickly grasped how much of a snip to make. Remember, polar fleece hides all flaws. Even if you snip too wide, it will be okay.

Then you bring the end of the fringette through the hole. Tug gently. Thus making a soft half hitch knot.

The other method has you tie the fringettes together in a double knot making the edges of these blankets more lumpy bumpy. This snip in the middle and push the end through method is a much softer knot that doesn't annoy you as much when you snuggle under the throw, but is just as secure.


 This right side has been done. Look at that red line. It's the opposite side as it comes through the slit forming that cool braided border.

One last tip: the fleeces don't shift because of the friction of the material holding them secure. But the weight of the blanket will slide over the table, possibly causing you to cut crookedly. Just roll up the other side to keep the weight of the material from shifting.

See that corner above? It had a 4" square cut out and you would never know.

 It took about an hour to make the first. AND stretch frequently for your lower back if you are bending over. The second blanket was only 60" square and took just over 30 minutes.

I have some video but no time to go through the laborious process in order to post here. You can catch them in my IG feed.


Photo Credit: DD; Cape Kiwanda

 I'm busy making notecards for my kids (who write letters just like their mama and their grandma!).
I'm using their awesome photography from the year from their various travels.


27 March, 2017

Dysfunctional Family Delights


The Camellias are awesome this year.

Is it ever gonna stop raining?


My mom and her niece.

My cousin died Saturday night. She was only 60, so this came as a surprise to many of us. I'll be 54 in May and if I still received a state newspaper, I'd be scanning those obituaries.


This cousin hails from my maternal relatives. Sunday, we got together for a family memorial service and the house was loud and joyful with many stories of said cousin floating around the rooms. 

You have the usual family problems in this room - alcoholism, autism, too conservative for nice words, etc. This side just steamrolls over all that. All are welcome. Good natured teasing is required and these relatives know how to laugh at themselves.


On my paternal side, we suffer from the usual as well; mental illness and depressions that cause family members not to talk to each other for decades, too conservative and too liberal. It's a much smaller clan. They are very sensitive.
No steam rolling here. Arguments fester in silence. Silent treatment is the preferred way of dealing with things.

I am fond of saying, "All you gotta do is be polite," and my kids were raised to "show up." It's a family obligation. You may not have much in common or get easily frustrated but, 'just be polite' handles most situations.

I loved this family get-together. I see these people every year or two, not that often. I can recognize them but my inability to remember names is laughingly put aside as everyone embraces and kisses and hugs and teases. I just love it.

Everyone knows the value of family, but how many know how to encourage it?
How does one embrace the better attitude?

Are you prone to laughing at your foibles or do you take it personally and get affronted when confronted with family?


I've been behind in writing letters - especially to my children who no longer live nearby. Older people, especially, love to receive letters. Have you written one this month?

I go in spurts but my serious overtime gets to me and I get bogged down in minutia. Grab a card from the dollar store and address the envelope. What stops me is thinking I need to write my life's story inside. Just sign your name and throw a stamp on and send.

Steam roll over your "too much thinking, not enough doing" inner voice and just do it.
Time's too short to hang on to festering family troubles. Move on.


Photo credit: Katrina in Sitka

Still no sewing. Busy dodging rain showers and working too much. And writing cards.

24 September, 2014

Wallet Design


 The thing about sewing purses and wallets is eventually, you have enough techniques to design your own.

I have been seeing these wallets with the strap that secures your credit cards all year (on other people) and contemplating how hard it could be to sew one up.


Well, first, you have to identify what you want that wallet to hold:

Credit cards (5 slots) and the strap to secure them - check.
Photo ID vinyl pocket - check.
Cash pocket - mad money - check.
Zippered pocket  - for change and other weird stuff - check.
Key Ring - check.
Small enough to hold in your hand - the essentials. - check!

Some of my inspiration was from these two tutorials that I sewed up on my blog.

Thimbleanna - A Purse Thingy  which I sewed up here, and here.
I liked the back pocket and the zip pocket but it was short on credit card pockets, This is where I made my ID template for my license. Hers was too small - easy to enlarge.


Fabric Mutt - Key Pouch Tutorial.   I didn't sew this one. Her card pockets were constructed in a way that would all be the same depth and I didn't quite get this. I loved the picture of it. It encompassed the 'look' I was after. 
I recently sewed her Malibu Satchel which turned out fantastic.


 The ID pocket was perfect.
I changed the template from the original inspiration to show more of my photo ID and not lop off the address portion. Oregon also puts their ID # at the top. The vinyl is big enough to show  most of the card.

For this one, I did ironing on both the inner and outside and then top-stitched it down.


 The strap is inserted when you sew up the zipper pouch. Secured with a metal snap. The strap also doubles as a more secure way to hold this wallet.

This wallet is made with a typical zipper pouch technique. All I am doing is adding things to the sides before I sew lining to lining, outside to outside and turning it .  There's room to do patchwork or other fun things to decorate it the way you want to.


 I made two.

The second one was made because I had a lot of bulk in my seams. My credit card pockets were the entire width and I narrowed them down by doing a trim tape finish and sewing that down before the zipper seam. This allowed my lining to sit nicer as well because the giant seam was not pushing it out.


And, even though, the wallet is not long enough to insert cash flat, I still wanted to sneak another slip pocket in and did so on the ID side.

 Snuck some dragonfly's inside.


 The second one is not quite an inch longer and today, I'm gonna make a third and see what another half-inch will do.
Plus, I'm not entirely happy with fabric placement on the second. I like the airplane and postage stamp showing from the first wallet....


99% Success

Easy to hold, carries most of the every day running around stuff. Just working on the nit-picky fussy cutting.


One more thing: Small zippered pouches like this with bulky seams seem to created havoc with the zippered ends. I used this Nancy Zieman technique to create fabric ends which neaten up the zipper amazingly. (sorry - forgot to take photo of how nice it looks when turned.)

14 July, 2011

Handmade Letter from the Scrap Basket


I  am long overdue in sending a card to a friend who is enduring chemo. I try to send one every week or so but with the summer bronchitis  I have not been doing my job of making sure her bright outlook remains high.
I rummaged around in my 'waste' basket pulling out fabrics I have been working with lately - scraps - with no plan at all. The pale yellow knit from yesterdays knit shirt success 'wound' itself into a rose sun. Then a house with smoke? (sunny summer day here folks) and windows with some flowers growing in the grass and up high, an airplane.

All of my cards to her feature an airplane. She doesn't have to read the inside, she can just see the airplane and know that my thoughts are circling above her, watching out for her.

 I stitched the denim to some card stock and zigzagged for good measure and took it over to my cutting board where, horror of horrors, I used my fabric rotary thingy to trim the edges tru-er.


Now to find an envelope that fits.


Hand made as well as it was actually just about right to fit my odd-sized card.


This whole project took me about 25 minutes 
including the time to photograph and write this blog post.

And, it took two stamps because it slipped over into the second ounce and it was a bit 3-D.


07 May, 2011

Airplane Pop-Up

Definitely distracted. We all manage our library requests and holds on-line in this county and I had forgotten why & when I put this book in the queue but it was a fun distraction when it showed up this week.
A book about making pop-up cards. And an airplane one at that.


My nephew has sent me his own pop-up card, so I wondered if I sent him one from the airplane auntie, would he make more?


POP-UP design and paper mechanics How To Make Folding Paper Sculpture went over all of the folds you might encounter and laid out instructions for some projects, including the jet flying through the clouds.

Duncan Birmingham is the author.
Card is in the mail.