29 January, 2015

SIBO Stuff and a Possible Graphic Photo

**not a sewing post

Update on keeping Kathy healthy:


I rarely talk about the medical crap I go through in order to stay functional. It's so negative and this blog needs to be a positive place for me to be.

 I have a stressful job (benefits), a stressful family (don't we all?) and precarious health as my body does not manage stress well. Anything I can do to minimize stress is a good thing (EFT, meditation, mindful meditation, creating and sewing).


I had a SIBO test last January (2014) and we all remembered about it back in October. The lab never sent my results which turned out to be positive.

Many of the symptoms listed are spot on: Food sensitivities, bloating, gastric distress, skin rashes, chronic fatigue, brain fogs,  migraines. Leaky Gut, Blastocystis Parasite - I've found out a few things over the years but could never quite identify/name/diagnose what was wrong with me.  The good news is there is a treatment available for SIBO.


So, this January, I am following up on the SIBO (see siboinfo.com).

Early January, I took Rifaxamin - an antibiotic. This was to kill off the bacteria overgrowth in my small intestine.
Initially, I felt great. The bloating was way down. But as soon as a few days afterwards - starting bloating again.

Following the GAPs diet. Which is difficult.
I figure, I will keep starting over on the GAPs diet till it becomes natural to eat this way. Essentially, a more liquid diet to get nutrition to the upper small intestine so lower part can heal. There are three stages and I get stuck at stage 1 and 2.

SIBO says that the small intestine is not doing it's job, motility is hampered or not happening.
Which leads to fermentation of bad bacteria in the small intestine and food particles going thru intestinal walls leading to immune responses (i.e. Leaky Gut).

GAPs diet tries to starve out the bacteria by eating every 4 -5 hours (3 -4 meals/day) instead of snacking. This is also supposed to help get intestinal motility back in action. I get about two days in and my head hurts and I don't want to drink any more broth or green juice. This is probably the bacteria die-off. I also have trouble eating fermented foods like sauerkraut but this is supposed to be a great pro-biotic in the GAPs diet.  Dealing with that now.

I retook the SIBO breath test a week ago - waiting on results. Probably still positive.

Also doing some intravenous vitamins like zinc and others to help provide healing nutrients.
Also doing acupuncture to aid in regaining motility and healing.

Too graphic?


The plan is to possibly re-take rifaximin in early March before I leave to Japan on the 16th.

Since the first round of Rifaximin, I have felt less (constant) bloating - a bit more intermittent. The inflammation and the bloating are really difficult to live with.

One of the things that has helped since last October is L-Glutamine. I have lost 10 lbs (4 months) using this everyday.
I have only been able to lose weight when I took foods out of my diet (food sensitivities/allergens). But there is no more food to take out. I am in constant vigilance to get enough food to be functional while minimizing my immune responses.


And that's why we are trying the Armour Thyroid right now - to see if that will help as well.
My thyroid for the last 15 years has been 'normal', 'low normal', etc. depending on how I feel when I do the blood tests.  My naturopath and my voodoo hippie doc both think, "let's try this too."  Although, the first week on it was constant headaches as my body got used to this new thing. This is my first day not waking up with a headache.

My main concern is being healthy enough to manage Japan in March. I plan on taking quite a bit of emergency food. For most of the time, I will be staying with a friend, so it will be as easy as I can make it, 'enjoying' 2 weeks of Japanese food. This friend also sews, so we will be talking sewing 24/7 which will jump-start my creativity.

The sense I get from reading anecdotal stories of the treatment plan are hopeful and may not cure forever but give me some relief from the horrible food sensitivities and all the other symptoms.

Currently, most of these doctor visits are out-of-pocket. They are not covered by insurance. I am spending what time I feel good in working on my online sales listings to generate income to pay for these necessary helpful healing steps.

I will say, these last couple of weeks, I have had sales that have paid for the intravenous vitamins and acupuncture visits in a way that makes me think - serendipity - meant to be - I'm on the right path for healing.

22 January, 2015

Amaryllis and Winter


I originally bought amaryllis bulbs as hostess gifts for the holidays. When said holidays rolled around these were only knee-high to a grasshopper and what with all the holiday fuss and bothers, I forgot for the first two parties and by the third, had reconciled with myself that four (!) looked much better on the windowsill than one lonely amaryllis.


We have been blessed with a couple of 50+'  days where the sun shines and you forget about foggy, grey, drizzly, sad January in Oregon. Where you smell Spring coming.

I trimmed up the raspberries and the grapes. They are now ready to burst forth here in the next few weeks. They won't get wild for a couple of months but they do better if you do a hard pruning now.

We kept 7 middle-aged fir trees and I am so glad we did. My replacement trees for the ones we cut down are coming along nicely but they aren't tall yet.

Those fir trees were home to hummingbird nests, bats in the belfry, owls, and other flying critters. This winter we have seen not one but two eagles flying around - probably to the dismay of tiny rabbits and voles but what a wonderous sight to behold. I think hawks might be prettier, but eagles - wowza.


20 January, 2015

Laney Hobo Bag In Linen


 I was fairly productive sewing-wise Sunday. It was raining cats & dogs outside. Just because we (Willamette Valley) have experienced a few days that proclaim Spring is coming - Mother Nature told us to back off a bit before we plant our gardens.


 This is a very cute Laney Hobo Bag - free pattern by Swoon Pattern. It's well written for the confident beginner sew-er. I say confident because the middle piece - perfect for fussy cutting/patchwork/embroidery is eased onto the side pieces. A bit of a curve there and while pinning often was addressed, cutting notches to help seam lie flat was not.  


There are only two pattern pieces. The side pieces need to be cut mirror-image which is clearly stated in the pattern. I think that's an advance beginner skill as well.

I, being an intermediate sew-er had to add a curved back slip pocket (with contrast piping - stash)  as well as a welted zipper pocket inside. Whats a purse without pockets? Bag jumble from hell.


I also added a little slip ring ??? at the top of the handle to hide the seams. It's made out of the lining material to add a little subtle bling.


 I did a welt zipper pocket inside and let the pocket lining 'appear' around the zipper.


 I cheated made this out of some linen -blend fabric that was reversible so even when I cut my interfacing not with a mirror image, I managed.

 Which is why I still say confident beginner because while you may remember to cut out the main side panels with mirror cutting, I am confident you will forget when it comes time to cut out your interfacing.

I interfaced only the main fabric as both fabrics were heavier than quilting cottons

I almost did not add the ties at the top middle because I would never tie these but I found some ribbon in stash that matched and went with it as a design element instead of a practical, useful, element.

The Laney Hobo Bag was easy to sew. Easy to add some design usefulness (pockets). In the mid-size of bags. This one is very spring/summer in off-white linen.

The link is here.


Doing almost nothing on a Sunday except watching the birds fight.
{Bad video from smart phone through kitchen window.
--See if you notice the neighbor's cat near the end}

10 January, 2015

Four Valentines


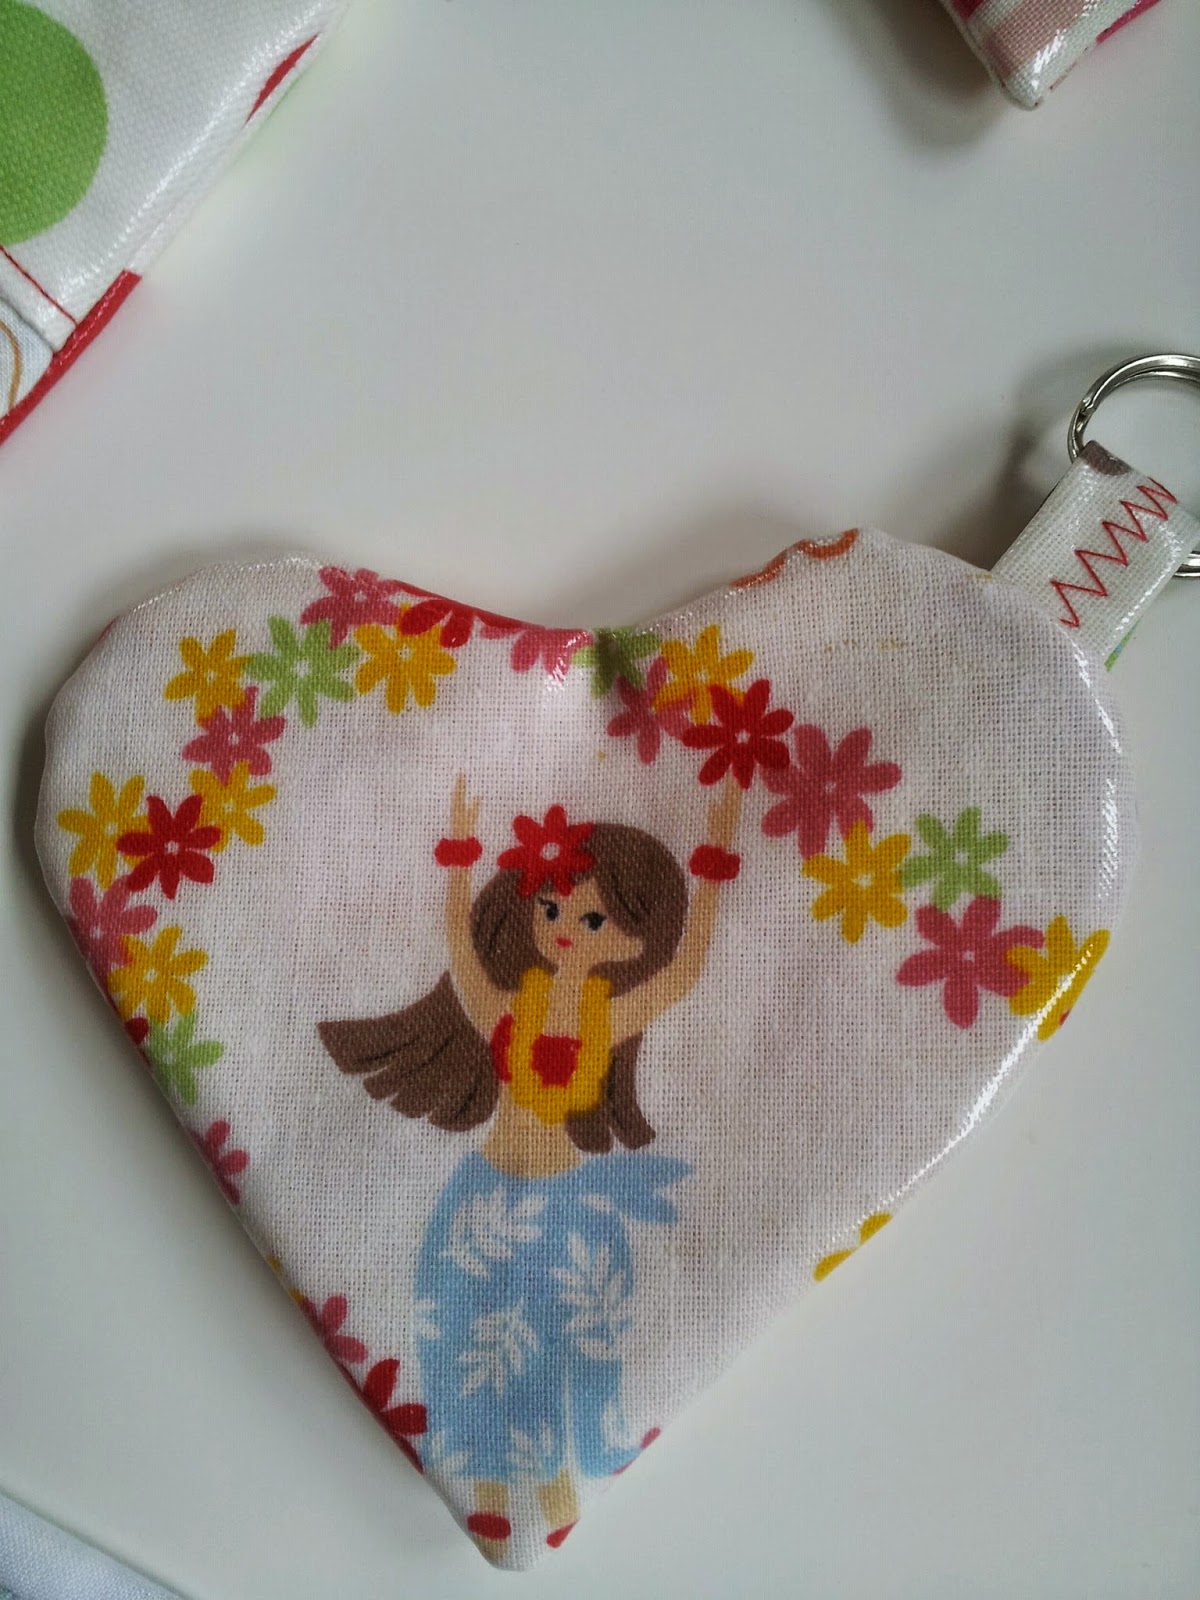
Back side Hula

She's my favorite!


I have a trip planned to Tokyo and Kyoto in March and I can't wait to see what other fabrics I've been missing. We don't have these cute laminates in the USA - we have some, but not these.

My friend buys scrap bags at her local fabric store in Kyoto and oftentimes, they slip a piece of laminate inside. She sent me four laminate scraps at Christmas and they got dumped on my ironing board.
The scraps aren't big enough by themselves to make much but they are just the right size to make these little earbud pouches.

They are now used as well as the rest of my nylon zipper stash.
I got a double score on my New Year's Resolution of sewing the fashion fabric until it's gonegonegone.

09 January, 2015

Heart Pouch


I saw one of these on facebook today about an hour before I had to go to work and get dressed.
I remembered Crafty Tokyo Mama had sent me some laminate scraps which have been sitting on my ironing board taking up space, cuz there wasn't a better spot.
I have three more small  pieces of laminate I plan to turn into heart pouches tomorrow.

Pouch measures about 3 1/2". Perfect for ear buds or coins or other tiny stuff.


08 January, 2015

Amaryllis


Much of the country is living in the minus numbers this week.
Here in Canbyland, we are enjoying a balmy 39' in a giant fog bank.
I'm sorry we have it so rough.

My amaryllis will be blooming soon
.
Third one to the right has two stalks!


02 January, 2015

Hot Pads


Backsides were not pieced - I had just enough 9" squares for 3 of the blue/silver and one of the white/music.


And, I'll have you know, I am using the teensy red scraps today on something else.
It might be my one and only success of using all of the fabric to it's very end but at least today ---  I'm sticking to my resolution.

Having a huge clean out sale  in my etsy shop right now.
RunningWithNeedles
Just use the code CLEANOUT2014 to get 40% off everything.

01 January, 2015

Folded Star Trivet


I pinned this folded star trivet tutorial a while back and when I saw these non-stick baking pans in turquoise at  my Grocery Outlet,  I got excited enough to make two for Christmas Gifts. 

The first went to Minnesota in my little sis's luggage in November with no photos as it was iffy if I could save myself postage on those pans and get the trivet done in time.

This is the second one. I've ironed out the peculiarities from the original tutorial which has you cut a bazillion 5" circles. This was because they were 'selling' the Go Baby Fabric Cutter and they must have had access only to the 5" die.

There is no need to cut circles. Squares work much better, especially near the 10" diameter edge where coverage was skimpy enough with the circles that a lot of hand sewing was done so the backing wouldn't show. The squares eliminate that hand sewing.


Each square is pressed in half and then folded points to middle to create folded triangles. Lots of pressing.


obviously - the back side


The last squares are 7" square and I lifted them up here so you see the layers underneath.
Those layers are 5" squares.

There are five layers in this star, however, you can make it any amount of layers depending on the size you want.

You do need to do a fair amount of hand sewing on this project but it's not rocket science stitching. Just tack down the points and then baste around the outer perimeter. Repeat for each layer.


When you start the project, you chalk an intersecting set of lines on your black interfacing/stereo cloth. This helps line up your triangle points.
The hardest thing is to put down your measuring tool and just eyeball where the points lie. Going for equal distance here. Then tack them down.


I found this thin black 'stereo' cloth at Fabric Depot and it has come in handy lately.
Very inexpensive but durable.

Just showing you the 'spiderweb' of stitches tacking things down.


Back to here. Once I basted things at the perimeter, I trimmed it all even with the backing. Then I made about 34" of bias tape for finishing. You do want bias as it will be going around the curve.
I made mine 1 1/4"+ wide. I then iron one long side down at 1/4" - helps with finishing and then eyeball and press in half, pretending I hadn't just pressed that quarter inch down.

I take the unpressed side of the bias tape and sew this on with a 1/4" seam. I fudge the ends together so it's one continuous circle using my clover wonderclips to help position the bias tape.
Once sewn, I flip over to the back side and hand stitch it down.


Sometimes, I bite the bullet and use my sewing machine to do this but I wasn't happy with my first trivet so I hand sewed the 2nd one.

No special stitch - just a side-to-side movement of grabbing a bit of item fabric, a bit of bias tape, a bit of fabric, bit of tape, pull needle through. It's mostly invisible and very quick to do.


I didn't use any batting as this is very thick in the middle with multiple layers of cloth. 
You could if you wanted to.


I have a New Year's Resolution in mind and I'm pretty sure I'm doomed to fail. Each time I get out a fashion fabric to sew with, I keep sewing until it's used up.

I did succeed with these: I strip-pieced the remainder of these five fabrics and made four hot pads.


Happy, Happy New Year!!!


 Having a huge clean out sale  in my etsy shop right now.
RunningWithNeedles
Just use the code CLEANOUT2014 to get 40% off everything.